Propagating Tomatoes From Side Shoots
Propagating tomatoes from side shoots is a simple and satisfying method for turning one tomato plant into several! Tomato vines propagated from side shoots are an economical way of cloning plants grown from expensive F1 seed. This kind of propagation can also extend your harvest period into fall. If you have the right climate, you might even be able to overwinter your rooted tomato shoots, and enjoy extra-early crops the following spring. So if you enjoy growing your own tomatoes, propagating new plants from side shoots is a fun experiment you should definitely try at least once. Here’s how it’s done.
Contents
- Why propagate tomatoes from side shoots?
- How it works
- What you’ll need
- 2 easy methods for propagating tomatoes from side shoots
- When will your tomatoes be ready to harvest?
- Can tomato plants grown from side shoots be kept over winter?
Why propagate tomatoes from side shoots?
Propagating tomatoes from side shoots gets relatively little attention compared with getting tomatoes started from seed. But this growing technique has some great advantages. Here are some of the reasons why you might like to try it:
- Some tomato seeds – especially the seed of popular F1 varieties like Gumdrop and Celano – are eye-wateringly expensive. At the time of writing, a packet of 10 Celano tomato seeds costs a whopping $6.95, because they come from plants which had to be grown in isolation and painstakingly hand pollinated. Rather than refinancing your house to buy multiple packets, you can buy one packet, and propagate side shoots from your young plants to boost your stock and save money.
- Propagating tomatoes from side shoots cuts out some fiddly growing stages, such as sowing, thinning out, and pricking out delicate seedlings. It also side steps all the things that can go wrong in that period, like failure to germinate and damping off of young seedlings.
- Plants propagated from side shoots get established and start producing flower trusses 2 – 3 weeks faster than seed sown at the same time. So if you’ve just missed the window for sowing seed, and you know someone willing to donate their side shoots, you’ll still be in with shot of harvesting your own toms.
- It’s great to use all the shoots that you remove when you prune your tomatoes, rather than throwing them away
- Finally, turning your side shoots into new plants is a great way to replenish your stock if you lose some of your tomato plants early in the season due to frost, underwatering or damage during transplanting.
How propagating tomatoes from side shoots works
Tomatoes are ideally suited to propagating from side shoots because they have the ability to produce adventitious roots from anywhere on their stem. ‘Adventitious’ means roots not growing from another root. In fact, all those tiny hairs you can see if you look closely at your tomato’s stem have the potential to turn into a root.
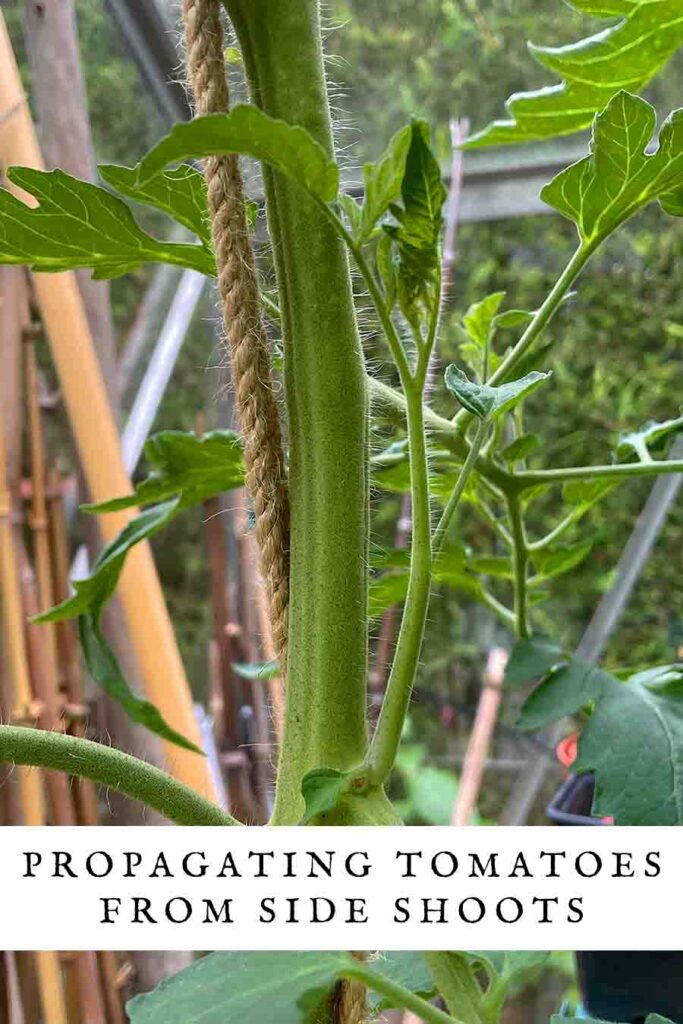
You can propagate side shoots from any variety of tomato, and you can even propagate the growing tip from an indeterminate (cordon) variety when it reaches the roof of your greenhouse or the top of its support.
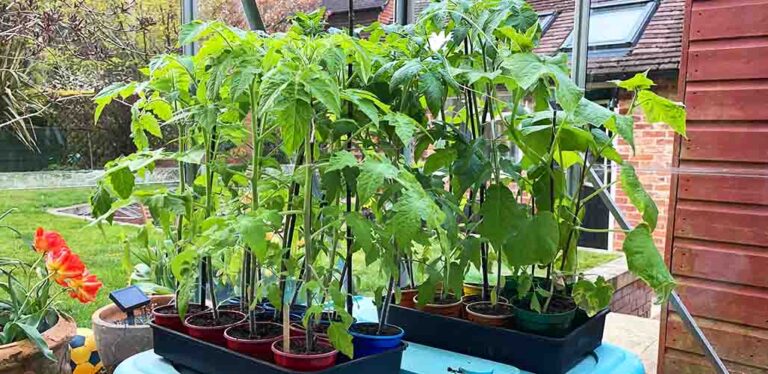
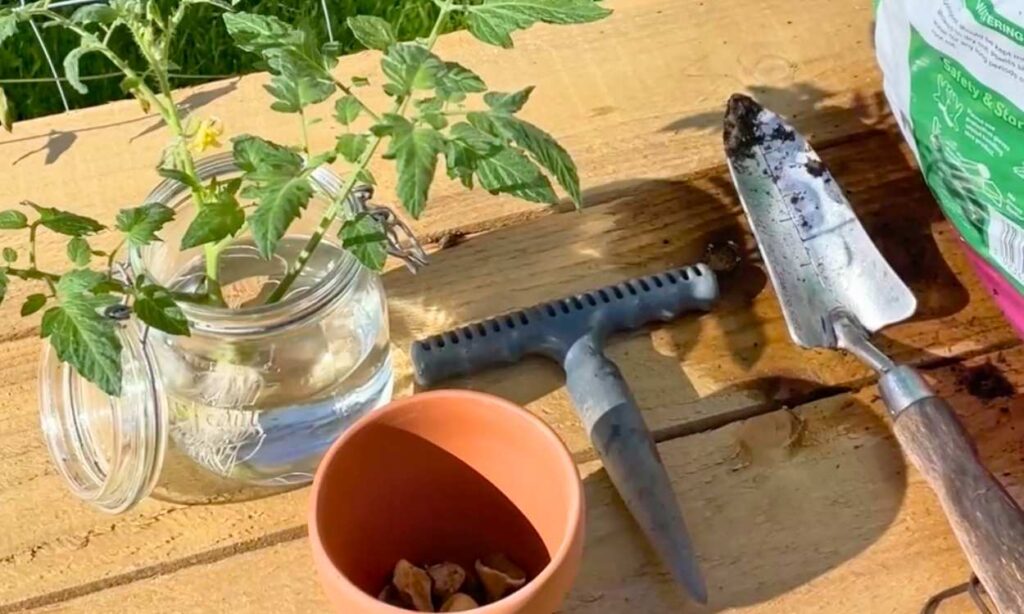
What you’ll need
Propagating tomatoes from side shoots is easy, and doesn’t require anything that you don’t already have on hand for growing tomatoes anyway. You’ll need:
- A donor tomato plant
- Jars and plant pots about 3” or 4” deep
- Clean pruners or sharp scissors
- Potting mix
- Vermiculite or perlite (optional)
- Rooting hormone (optional)
- Plant labels
2 easy methods to try
The time to cut tomato side shoots for propagation is usually May or June. If you leave it too late, your new plants might not have enough time to bear fruit. The warmer your climate, the later you’ll be able to take tomato cuttings and still have time for them to reach maturity. Once collected, you can root your cuttings in water, or in a potting mix.
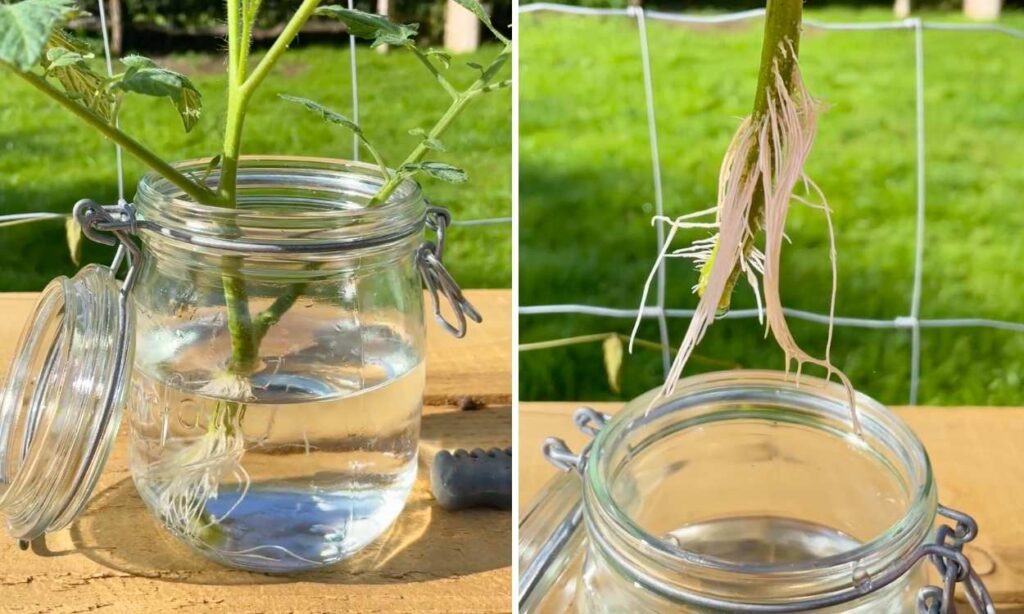
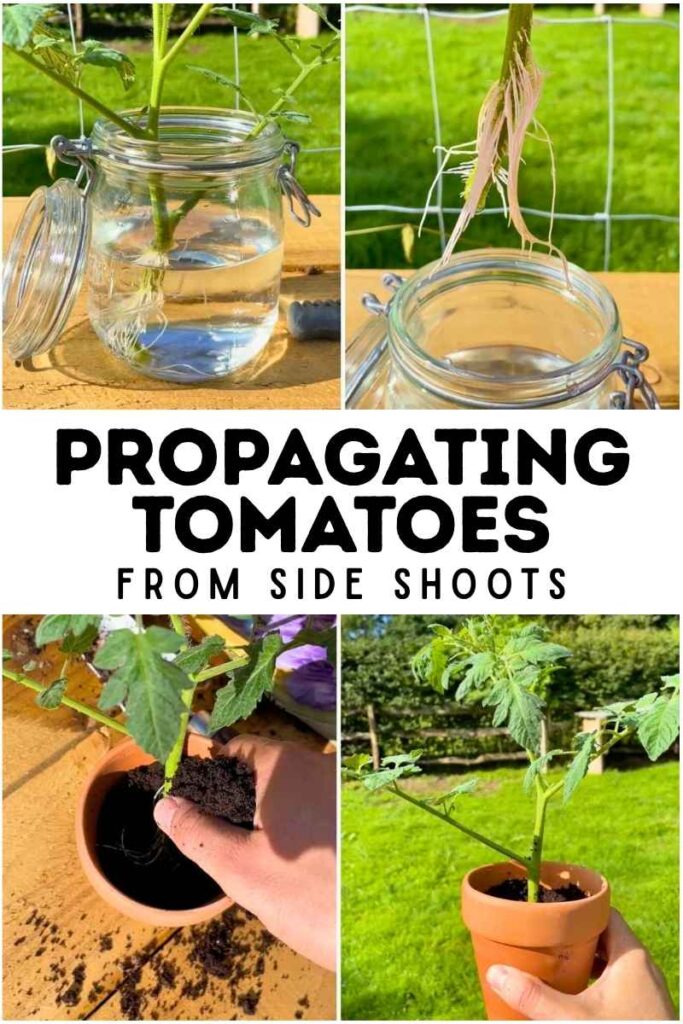
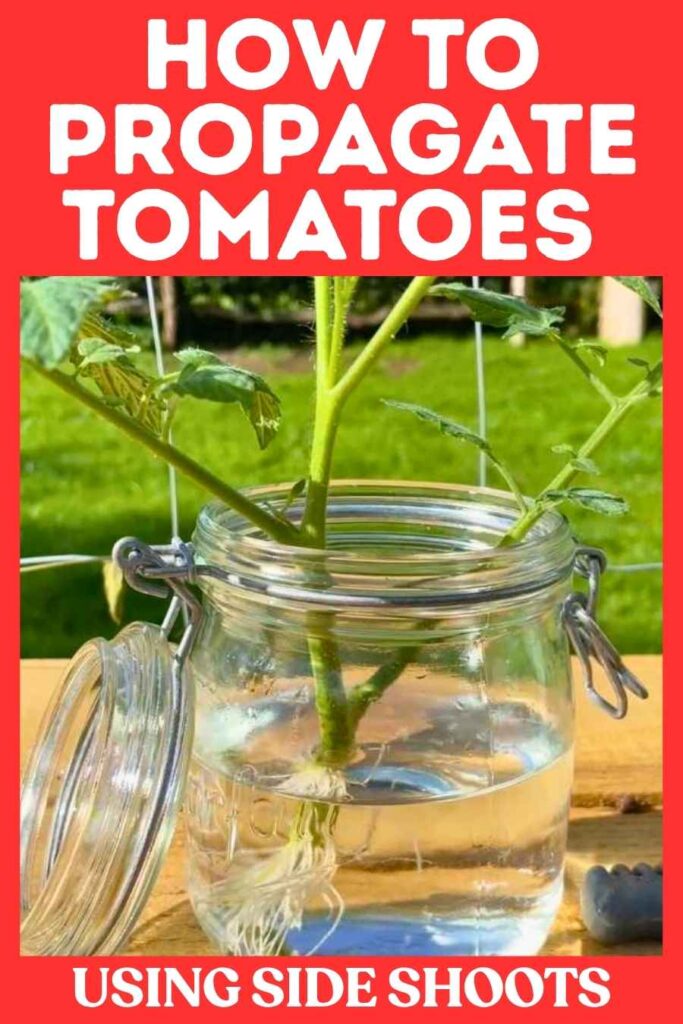
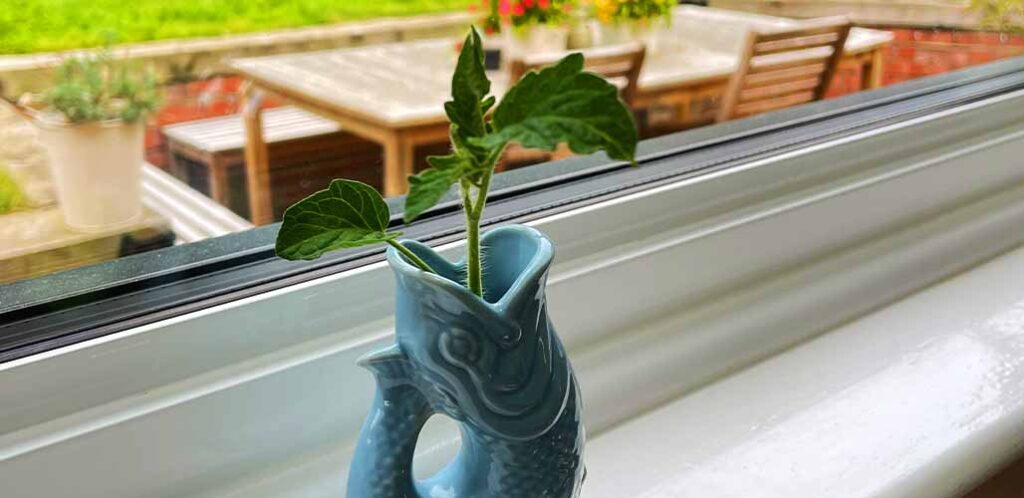
1. Propagating tomato side shoots in water
This is the most uncomplicated and accessible technique:
- Fill a 3 – 4” tall jar with water. A clear glass jar or drinks tumbler is ideal, because you’ll easily be able to observe your cutting’s progress.
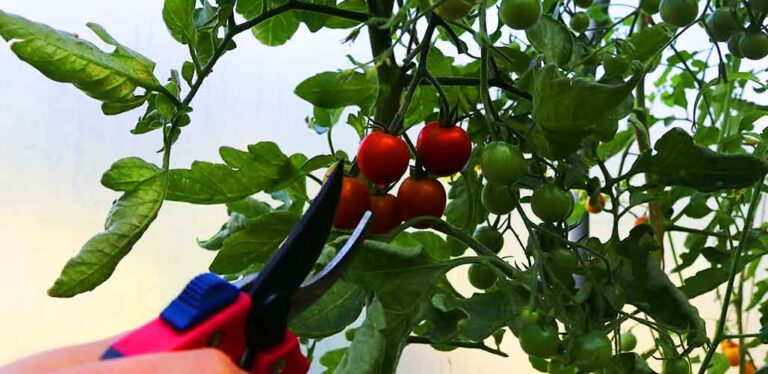
- Remove one or more suitable side shoots from your donor plant with clean pruners or scissors. Try to choose shoots at least 4” long.
- Pop your cutting straight into the jar of water. If any of its leaves are partly or entirely submerged underwater, lift the cutting back out, snip them off, and return it to the water.
- Place the jar in bright, indirect light.
- Every 3 days, tip out the water and refill the jar.
- After 3 or 4 weeks, the cuttings should have produced lots of strong and healthy roots.
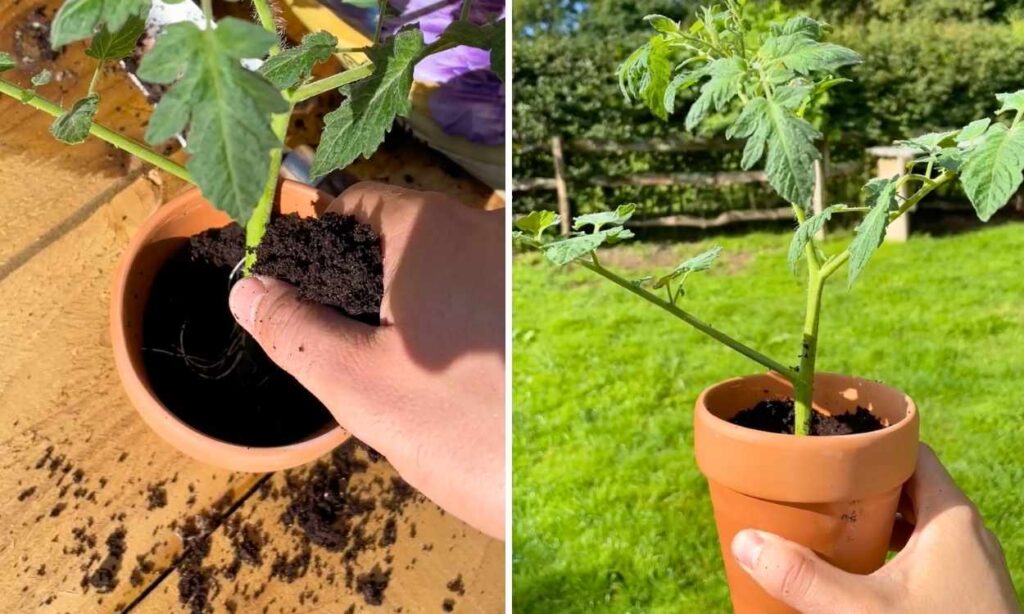
- Transplant your cutting into pots of potting mix, and grow on like the rest of your young plants.
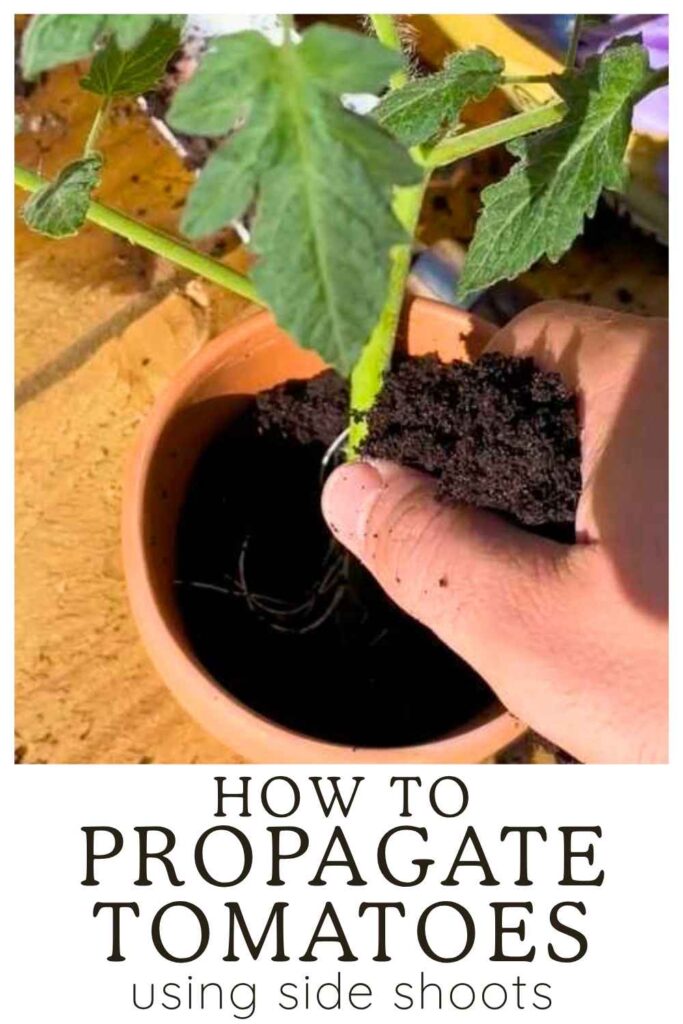
2. Propagating tomato side shoots in soil
Alternatively, you can put your side shoots straight into a growing medium of 2 parts potting mix and 1 part perlite or vermiculite.
- Fill a 3” diameter pot with your growing medium. Tap the base of the pot on a hard surface to settle the contents, but don’t firm it down.
- Take your cuttings, and remove any leaves which would end up submerged below the surface of the growing medium.
- Dip the bottom half inch of the cutting into rooting hormone if you have it, but this isn’t essential.
- Poke the cutting into the growing medium. Water gently, and place in bright indirect light.
- Your new plant is ready to pot on when the roots start to poke out from the drainage holes in the bottom of the pot.
This method has an advantage because it cuts out the step where you transfer your rooted cutting into a small pot of potting mix. Everytime you transplant a young plant, there is a recovery period immediately afterwards when it stops growing. So this method is quicker overall. But, you won’t know whether your side shoots have successfully rooted until the roots appear from the bottom of the pot.
If you don’t have perlite or vermiculite, lots of tomato growers report being successful without it. But you’ll have to take extra care not to overwater your cuttings and leave them standing in waterlogged growing medium.
Aren’t cuttings rooted in water the very definition of waterlogged though?
Good point, and here’s what’s different. Whichever method you use to propagate tomatoes from side shoots, the new roots will need oxygen to generate energy for taking up water and nutrients. Tap water contains dissolved oxygen which your cuttings’ roots can use for this purpose. The reason for replacing the water around water-rooted cuttings every three days is to replenish the dissolved oxygen available to your cuttings. If you leave the water to stagnate, the roots will eventually suffocate, and the cuttings will die. And since you can’t take the water out of a pot that contains soil, it’s important not to put too much in it in the first place!
When will your tomatoes be ready to harvest?
Tomatoes grown from side shoots are usually ready a little later than tomatoes grown from seed sown earlier in the year. This means using both propagation techniques in the same year can extend your harvesting period further into fall than it would usually go. But if you time it wrong, your fruit might also run out of time to ripen on the vine. If this happens, all is not lost. You can:
- Line up your nearly-ripe tomatoes on a sunny window sill to ripen them.
- Put them in a paper bag with a banana. Bananas release ethylene gas (also known as ethene gas) as they ripen, which also stimulates other fruits to mature.
- Turn your green tomatoes into green tomato relish to enjoy later…
- …or fry them or add them to curries to enjoy now!
Can tomato plants grown from side shoots be kept over winter?
Overwintering tomatoes grown from side shoot cuttings is a really interesting growing experiment. Whilst the vast majority of kitchen gardeners grow tomatoes as annuals, the vines are actually short-lived perennial plants in their native tropical climate. They have very low tolerance of cold-temperatures, but if you have the space and the means to protect them in a heated greenhouse or indoors, it is possible to keep tomato plants alive over winter.
Usually, a vine which has already fruited in its first year isn’t worth keeping over winter. Firstly because it will be too big to protect. And secondly because it won’t be as productive in its second year anyway. However, a small plant propagated from a side shoot late in the growing season, which hasn’t fruited yet, could more easily be kept indoors over winter, and it will have a head start on growing come spring.
Beside finding space to shelter your cutting, another set back for lots of growers is the reduction in sunlight in winter. Young plants without enough sunlight are prone to getting leggy, unless you also have a grow light for them. So, overwintering tomato cuttings requires quite a bit of investment. But it’s fun to try if you think you can make it work, and I’d love to hear how you get on!
Propagating tomatoes from side shoots – summary
Propagating side shoots from young tomato plants is an economical way to increase the size of your crop. It’s also a good way to catch up if you realise you’ve left it too late to start growing tomatoes from seed. You can choose between rooting your cuttings in water or potting mix – or experiment with both to find out which you prefer! You new plants will probably bear fruit a little later than the vine that donated them. If you’re feeling really adventurous, you can even try overwintering root side shoots, for early crop next year.
You might also enjoy: