How to Successfully Propagate Monstera in Water
Monstera propagation is remarkably easy if you know what you’re doing. I am not a patient person, but even with my rushed methods I have still had a huge amount of success propagating my Monstera plants. It only takes me a few quick steps, and a few weeks to successfully propagate my Monstera cuttings in water.

You can use these methods to grow brand new Monstera plants from any variety of the plant, but it’s worth noting that some types are easier to propagate than others. And that you will need a slightly larger propagation station for bigger cuttings, as I have had my new root growth get the cutting stuck in the glass bowl before when I let it get too large…
When Can I Start?
I usually propagate my Monstera plants during the Spring time and into summer, but there is no reason if your house has the right levels of light and heat that you couldn’t successfully propagate cuttings any time of year.
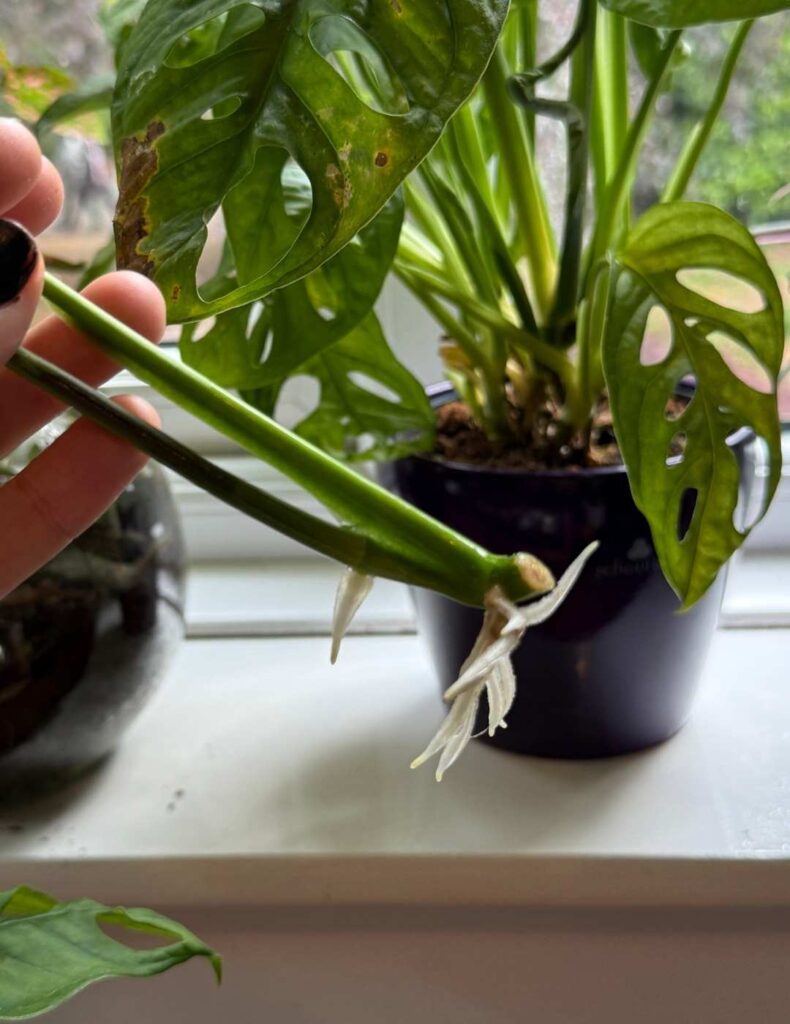
All you need is a healthy Monstera plant, with an exposed root nodule that you can remove without taking all the leaves your plant needs to continue to thrive.
I have successfully, repeatedly used this method with a few different varieties of Monstera, including Adansonii, Deliciosa and Thai Constellation, and it should be directly transferable to any type. All you need is a node and leaf!
Setting Up Your Propagation Station
I always make sure my propagation station is set up and ready before taking cuttings from my plants.
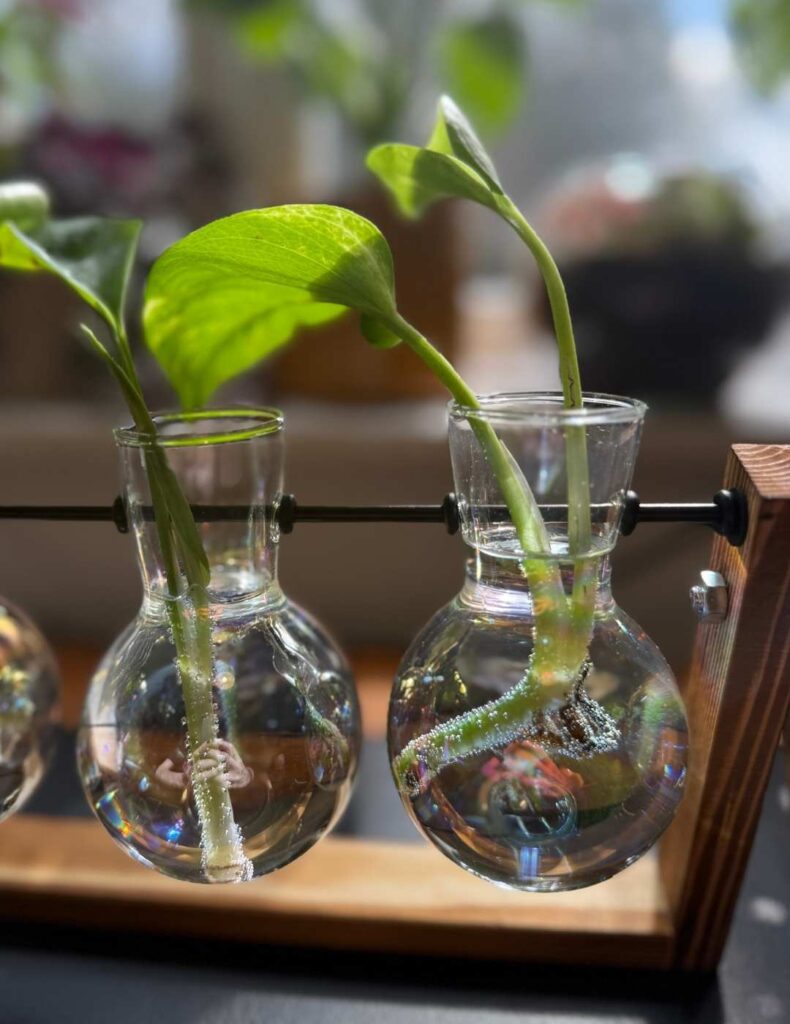
I have used a lot of different containers to propagate my houseplants over the years, but I’ve settled on a very traditional one. It’s a series of glasses, raised on a bar which goes through the center of the neck of the glass and attaches to a wooden frame.
If you buy the right propagator, they last, look lovely decoratively as well as growing brilliant roots in your cuttings, and are really fun to watch at work.
If you don’t have the budget for one then you can use a glass from your kitchen, but having the base raised and light exposed from all angles definitely helps to promote rapid root growth.
Taking Cuttings of Monstera Plants
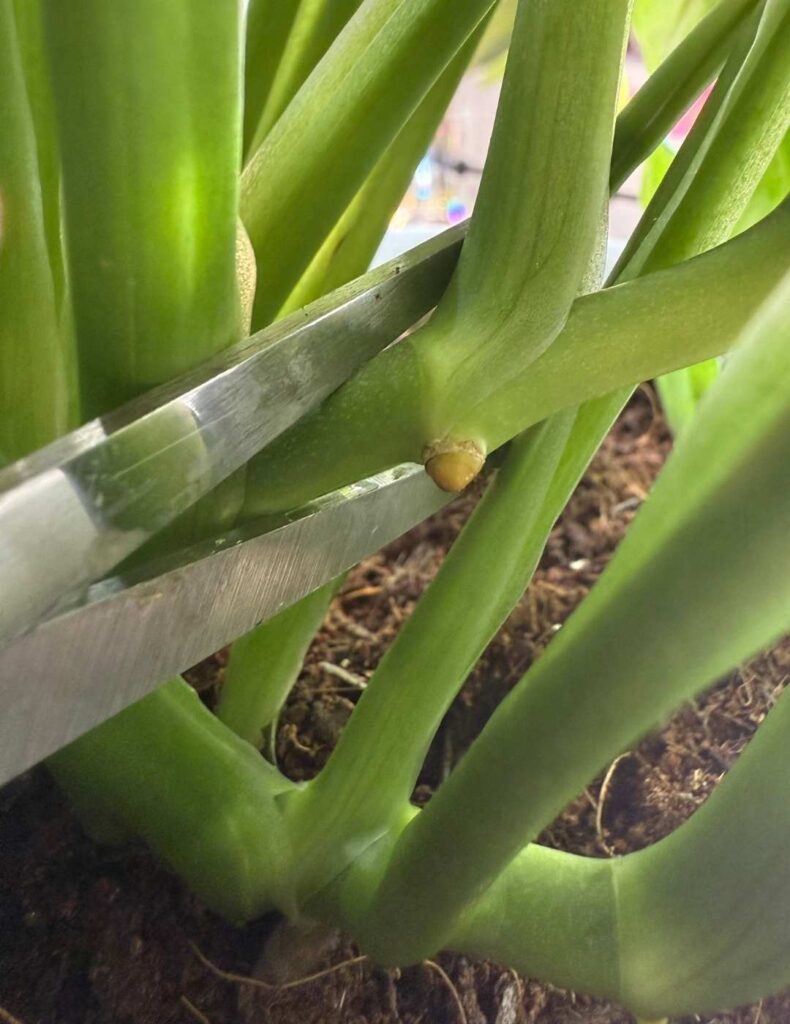
All you need for this part is a sharp knife or pair of scissors. I personally use scissors, but the sharpness is really the important part. You need to be able to slice cleanly through the stem, just like cutting flesh, the neater the incision the better the plant will heal.
I highly recommend disinfecting your scissors before you cut. No, I don’t always bother, but I’m playing with fire when I don’t because each cut invites bacteria or fungi if they are unclean.
Most people believe that you want to take what are known as top cuttings. This basically means snipping off the nodes that have appeared at the topmost stem of the plant. And because Monstera grow in sections these are pretty easy to spot.
I have on multiple occasions taken cuttings from stems that have protruded from the side of the plant instead, and honestly I’ve never seen any difference in the plants they produced. That doesn’t mean there isn’t some truth to top cuttings being easy to grow or more primed for producing a new plant, but I just want to reassure you that if you decide to take cuttings from another area that they’ll likely do just fine.
What you need to be the most careful of when choosing your cutting, is to make sure that it doesn’t damage the health of the main plant. This means don’t take too much off, and if your plant is looking unhealthy, yellow leaves or wilted for example, it’s best left until it’s in a better condition before injuring it and exposing it to potential disease.
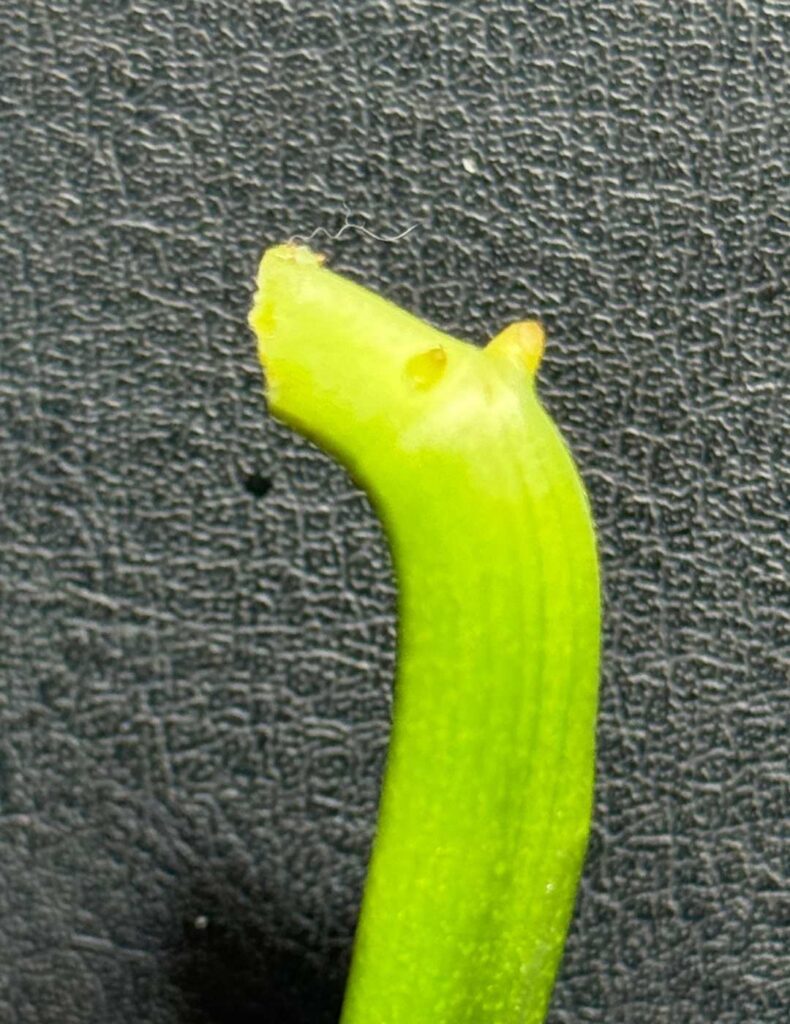
You want to cut underneath the round raised node section, ideally where there is a brown aerial root sticking out.
Pick a leaf or two with an aerial root apparent at the base. No more than two leaves is best, because I find that the extra energy to support more leaves ends up with the roots growing much slower and spreading less.
Put your scissors behind your chosen node, and snip cleanly through the stem. Place it on your desk on a piece of paper towel or a dishcloth, and leave it for around half an hour just to allow the plant time to air dry. Dap the sliced end to ensure it’s dry before you put it into water.
Place the root node end of the cutting into your glass propagation jug.
And Now, We Wait…
It usually takes an absolute minimum of three weeks for my monstera cuttings to grow large enough that I’m happy they’ll service repotting. A few times I’ve got impatient and removed them from the glass quicker, and they have not lasted when I potted them up. They simply slowly withered, in the way that a flower cutting in a vase would over time. I now err on the side of caution, and leave them in the propagator until I’m really confident.
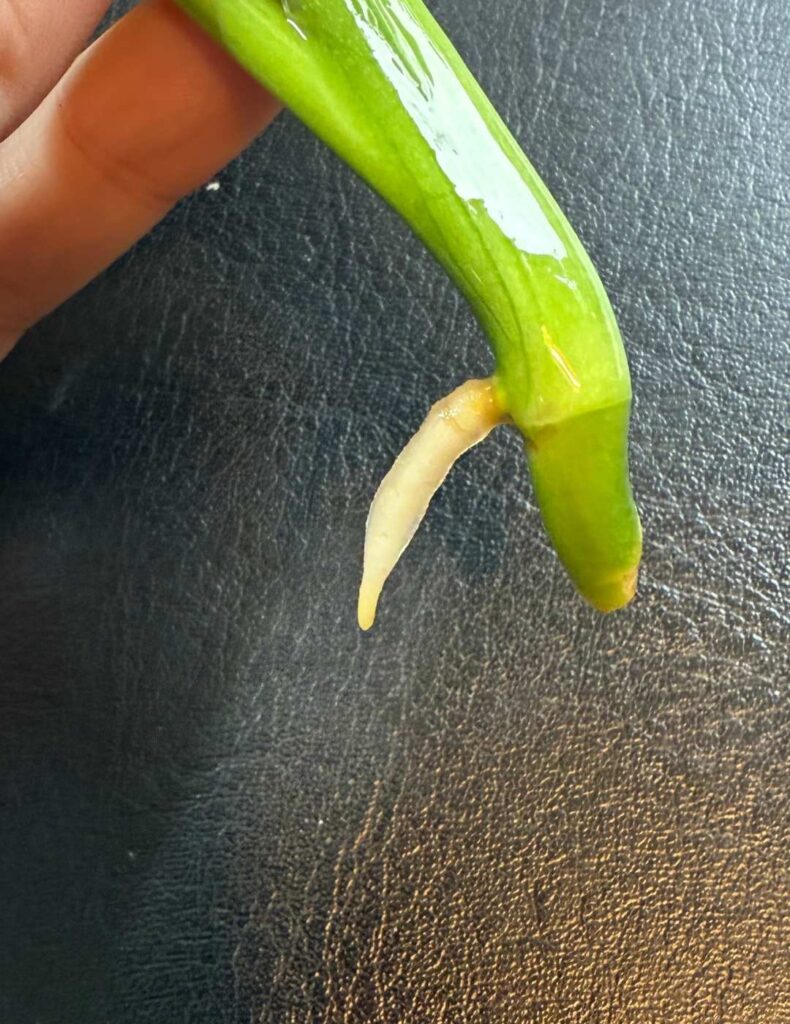
I must admit I do this by eye these days, but I’d say at least 10cm of singular root growth, or multiple roots of at least 5cm should do the trick.

It’s worth tipping half the water out and replacing it every three days or so, and topping up if the heat is high in your room and it evaporates in the interim. This isn’t essential but removes the risk of the water becoming stagnant.
Repotting your Cutting
Once you’ve waited those long days for your cutting to be ready, it’s time to pot it up. I like to use a slightly bigger pot than the cutting necessarily needs, just because repotting is a messy hassle so I’d rather not have to do it so often. A pot that’s too big can lead to waterlogging and roots rotting, but if you make sure your soil composition is correct this shouldn’t happen.
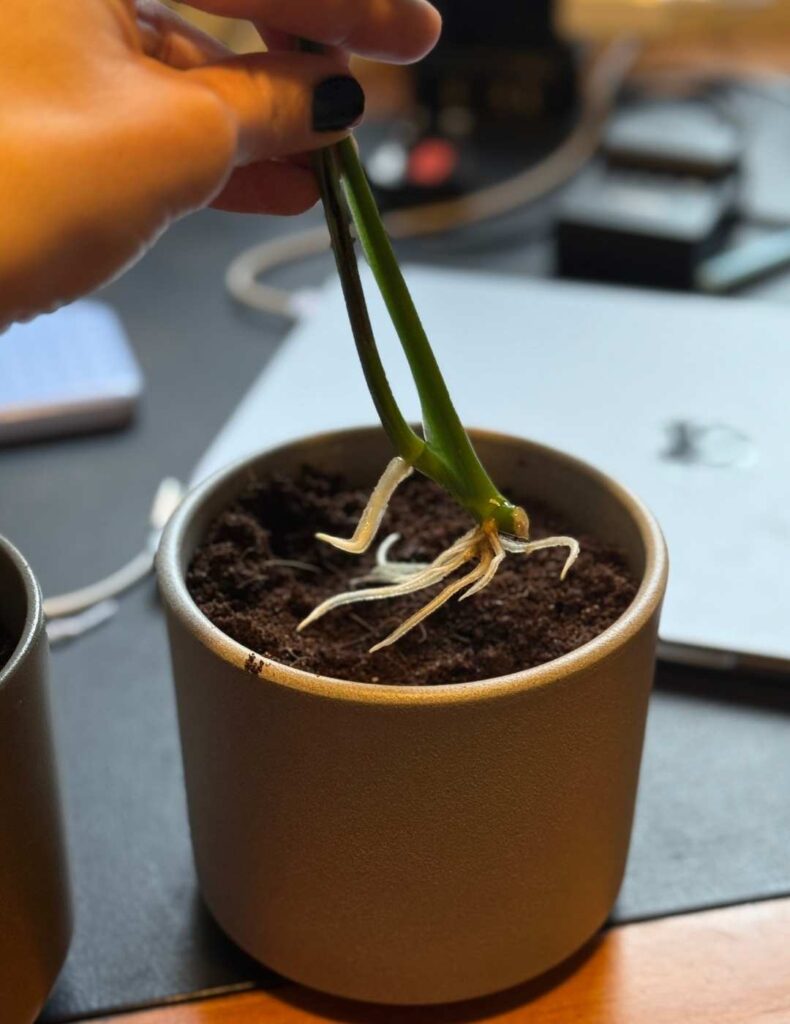
Select your pot, then make a mix of around 50% potting soil, 25% bark and 25% perlite. Monstera love aerated soil, so this mix might be a bit of a hassle but it will give your plant the best chance of growing into a new gorgeous Monstera plant.