Building A High Tunnel From Scratch – My New Hoop House Adventure – Step By Step
If you’re thinking of building your own high tunnel, this is for you! My dream hot house would be one of those lovely old victorian greenhouses, with wooden frames and glass windows. But as my better half points out, who is going to paint all that wood every year!
Nowadays, the modern high tunnel or hoop house has taken over commercially from greenhouses, and many home gardeners have made the switch too.
So when I wanted to expand my production of plants that like heat, such as tomatoes, bell peppers, and cucumbers, I decided on a large, walk-in polytunnel. If you are thinking of doing the same I suggest you read what follows to get an idea of what’s involved, and how to avoid the mistakes I made!
SPOILER: This was not an easy project!
I’m going to cover the following
- Choosing a polytunnel
- Choosing the right location
- Preparing the ground – 3 big challenges
- Assembling the frame
- Putting the cover on
- Preparing the beds
- Planting the crops
- Managing the temperature
- Building staging / shelves
- What would I do differently?
- Should you build your own?
I won’t be going into details of individual crop care here but I’ll link you to the relevant articles for those. This is a journal, or work in progress, so check back regularly for updates! And of course you are welcome to ask questions or make comments below!
CHOOSING A POLYTUNNEL
Where to buy the parts
A high tunnel, or walk-in polytunnel, is basically a row of hoops covered with thick polythene sheeting. You can buy high tunnels in kits from many suppliers online, and some of them also offer a construction service.
Having a tunnel constructed for you will add a lot (maybe as much as 50%) to the price of your hoop house. But after reading what it took for me to get my high tunnel completed, you might want to seriously consider doing that!
High tunnels are not cheap, and if you are a clever construction geek, you might want to source the different parts of your tunnel from different suppliers. But for a beginner I recommend you get the whole kit from a reputable supplier who will be able to sell you replacement parts if you lose, bend, or break them.
How big should I go?
I already have a tunnel that is about 8 feet wide and 12 feet long. I’ve outgrown it now, but I recommend it as a great size to dip your toes into the water with greenhouse gardening.
Domestic high tunnels tend to max out at about 14 feet wide and 25 to 30 feet long. And I chose a 14 foot by 30 foot hoop house for our yard.
Commercial tunnels can be pretty much as big as your imagination. So whatever size your yard, there’s almost certain to be a tunnel that will work for you. Maybe avoid a really huge one for your first tunnel, especially if you intend to build it yourself.
Choosing foundations that cope with wind
As you can imagine, large areas of polythene sheeting act like a sail in high winds. Having already experienced a tarp-covered chicken run taking off like a guided missile and gliding fifty feet down our garden in high winds, my first consideration with a new high tunnel was “how do we stop it being blown away”
I soon discovered that there are several different ways to secure a tunnel to the ground. And those methods may vary from region to region depending on weather conditions. In my location hurricane force winds are rare and we don’t experience tornadoes. But gale force winds are common and can cause a lot of damage. My options Included the following:
- Trench the polythene
- Attach to giant screws
- Attach to soil plates
- Attach to wooden beams
- Attach to concrete
Some of these methods are more labor intensive than others. The first three avoid constructing a solid foundation and mean that the polytunnel can be built straight onto the soil or grass. I didn’t want a permanent structure that would be very difficult to move, in our garden, and I was daunted by the idea of making a proper foundation. So for me, that eliminated options 4 and 5.
Digging a trench all the way around the high tunnel in which to bury the bottom of the polythene in our stony soil sounded a bit ‘hit and miss’ to me. And I thought we would struggle to get screw fittings into our ground.
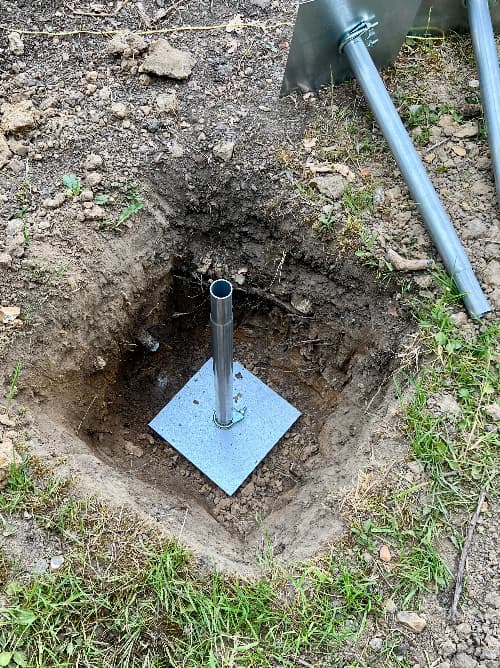
So in the end I decided on the soil plate method. This simply means digging a square hole for each upright pole, and attaching it to a flat metal plate placed in the bottom of that hole.
As we’ll see, the word ‘simple’ is a little bit of an understatement.
Making your mind up
Once you have decided on the right size tunnel for your plot, and on the type of foundations you want, it’s time to place your order
You’ll be offered lots of optional extras like crop bars, staging, automatic watering systems and so on. Here’s what I suggest you choose.
Crop bars: Crop bars are struts that go across the tunnel from one side to the other above your head. In my view these are pretty much essential as they enable you to attach strings and other types of support for your climbing crops. If you are great at DIY you might not need them.
Staging: Staging is a set of metal supports that run down the side of the polytunnel to support shelving. Useful if you want to have a potting area or to bring on a lot of seedlings in trays. Again if you are handy with a hammer and nails you probably won’t need this.
I opted for crop bars and staging for one side. And skipped the rest. I figure we can add an automatic watering system later if we need to.
If you choose a supplier with a good youtube channel you should be able to see videos of all these different options to help you make up your mind. And once you’ve pressed that submit button, all that remains is to wait for your tunnel to arrive! Mine came really quickly – about three or four days.
CHOOSING A LOCATION
Positioning your new high tunnel
You’ll need as sunny a position as possible. A little shade for part of the day is not a problem, but if you’re intending to extend your growing season, remember your aim is a hot house.
Also, if the shade on your tunnel comes from a tree, you’ll likely have twigs and other debris falling from it from time to time. Which at worst could damage your sheeting. So choose as open a spot as possible.
North-South vs East-West
I was told by a friend who has owned many polytunnels, that a structure that runs from North to South has the smallest area exposed to north wind and for that reason may be easier to heat.
But I really wanted the front of my tunnel to face (be at right angles to) the main path that passes down the side of the field where we were locating our tunnel. And in the end, that influenced me more than the north winds. I may regret that in time but I’ll let you know.
Once you’ve chosen the approximate location you’ll need to mark out your plot. But first, you might want to prepare the ground a little
GROUNDWORK
Preparing the ground
I’m going to be planting directly into the ground in my tunnel. If yours will be entirely raised beds you might want to skip this part.
As my new high tunnel is located on what was pasture, and the grass was very compacted on stoney soil. And because I was in a bit of a hurry, I decided to kill off the grass and till the ground before I started.
If your tunnel is small you might want to lift the turf carefully and use it elsewhere in your garden.
And if you have plenty of time you can suppress the grass by covering it with a thick layer of cardboard (this will rot down in time) and cover that with plenty of potting soil, or diy compost.
Marking out the plot for your tunnel
I learned a lot in this process. But my key takeaway is this: before you begin, mark a line that shows exactly how you want the front of your polytunnel to line up visually with an important visual edge in your property.
I’ll explain what I mean, and why this is so very important as we go.
What is a visual edge?
Unless you live in the middle of the prairie or a desert, most plots of ground have lots of what I call visual edges. Those edges might be fences, paths, buildings, or hedges. They could be the edge of your vegetable plot of the edge of a wood. Either way, the human eye notices these edges and how the buildings we construct relate to them.
And we are very good at perceiving tiny differences both in height and in judging whether two lines are parallel to one another. And if they are not, it can look very odd. Bear this in mind
Lining up your plot
The tunnel foundation you mark out on your ground has to be a perfect rectangle. Yes, I do mean perfect, and no, getting it perfect is not that difficult.
The problem is that if the front edge of your polytunnel is not exactly paralell to the visual edge that you want it to line up with, when you make your perfect rectangle, based on that front edge, the whole tunnel plot will look very obviously skewed relative to everything around it.
I soon discovered that this means a certain amount of fiddling around. I’ll explain as we go.
Tools you will need
Your tunnel may come with a wrench to fit the bolts in the kit, or it may not. Either way, you’ll need some basic tools to complete the job. I had to gather more as I went along because I didn’t have all the tools I needed at the start. This is the kit I assembled:
- Two surveyor’s tapes
- A one yard wooden ruler
- A soft mallet
- Scissors
- Garden twine
- A heavy builders spirit level
- A small spirit level that hangs on twine
- A sharp hand trowel
- A sturdy shovel
- A cordless impact driver
- A chop saw
I also ended up buying a gas powered auger, more of that in a moment.
Surveyor’s tapes are great. My steel measure wasn’t long enough for my 30 foot tunnel, and you’ll need two measures when getting your rectangle square. I should also mention that this is really a two man job. It’s hard (not impossible) to do on your own.
Making your perfect rectangle
Making a perfect rectangle isn’t difficult. A helpful guy named Pythagorus figured it out for us. You simply need to know the exact length of the diagonal (corner to corner) for a rectangle of a given length and width. Pythagorus’s calculation can be found online. Just enter the length and width of your tunnel and the calculation will be done for you.
Now all you have to do is to make sure both diagonals on your rectangle are identical.
In a perfect world (and according to the instruction manual that came with our tunnel kit) you should bang the upright posts into the soil to temporarily mark your corners. But in my world there was no way those metal posts were going into my rock hard ground. The post would be giving way long before the ground did.
So this is the method I used:
- Put a peg into the ground where you want the corner of the front of your tunnel to be. This is peg 1
- Put a second peg into the ground so that the distance between your two pegs is the exact width of your tunnel. In my case this was 14 feet.
- Tie some brightly colored string between the two pegs and look carefully at this line from different directions. This will be the front of your tunnel, does it line up with any visual edge that you want it to be parallel to?
- Attach the end of your surveyors tape to peg 1 and get your helper to walk the length of your tunnel with the other end of the tape. They need to stop and hold the tape when the reach the required measurement. In my case 30 feet.
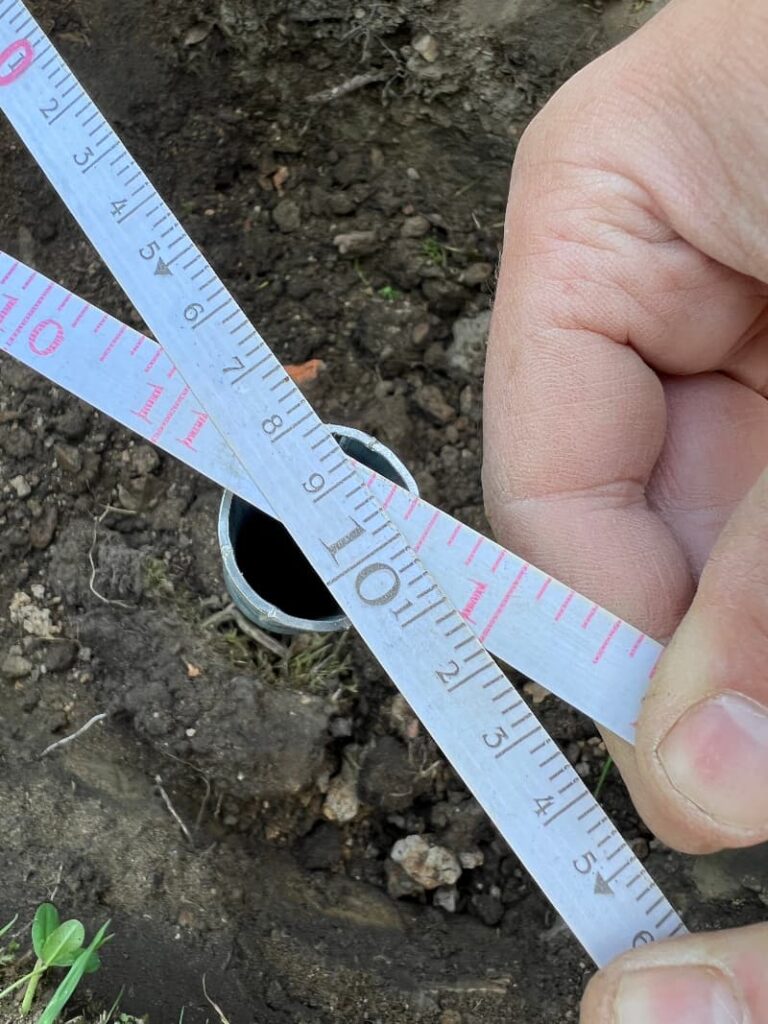
- Attach the second surveyors tape to peg 2 and walk towards your helper with it until you reach the required diagonal length. In my case 33.1 feet or 10.09 metres. I used metres for this as it was more precise.
- Mark the point where the correct diagonal meets the correct length, with peg 3.
- Find peg 4 in the same way with the length from peg 2 meeting the diagonal from peg 1
- Measure the width between pegs 3 and 4. It should be exactly the same as the width between pegs 1 and 2.
- Tie brightly colored string between your remaining pegs and stand back to make sure you are happy with the position of your tunnel.
Possible problems
If the front and back of your tunnel are not exactly the same width, you need to remeasure the whole thing carefully paying close attention to where the end of the tape is secured and to the exact point there your diagonal and your length meet.
If the tunnel looks odd or skewed as mine did after the first attempt, then its likely that the front of your tunnel is not exactly parallel to the visual edge you want it to line up with. You may need to tweak this and then remeasure the other pegs again.
When you’ve got this right, keep your calculations to hand because this is just the start. You are going to have to do it again. Probably more than once. But it will be easier next time!
Digging the post holes
What follows is what we had to do next because I had chosen the soil plate foundation method. So for each post we had to dig a square hole big enough to give the soil plate room to be manoevred as we tweak and adjust our measurements.
Post hole dimensions
Your high tunnel supplier will recommend dimensions, which will probably depend on the size and weight of your tunnel. Our dimensions were 18 inches wide, 18 inches long and 18 inches deep. It was the deep part that caused us some problems.
This 18 inch square must be dug around each of your pegs, with the peg exactly in the center. So mark your square out, and then remove the peg and start digging
Challenge no. 1 – a layer of solid chalk
Beneath our turf we discovered some challenging terrain. All the soil was very stoney and very hard. And one went through a layer of solid compacted chalk.
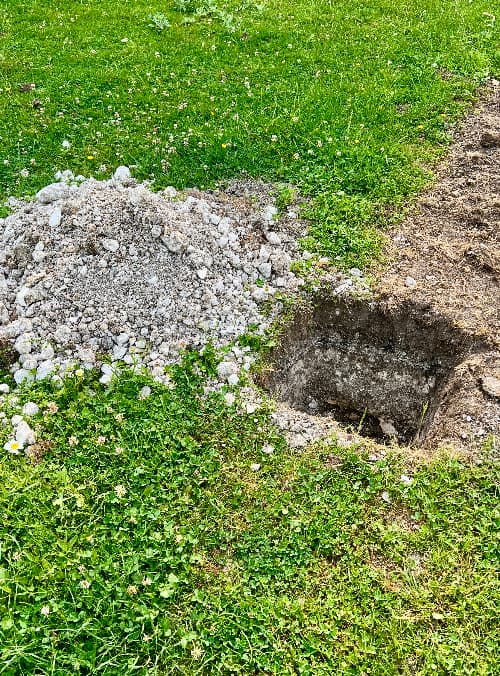
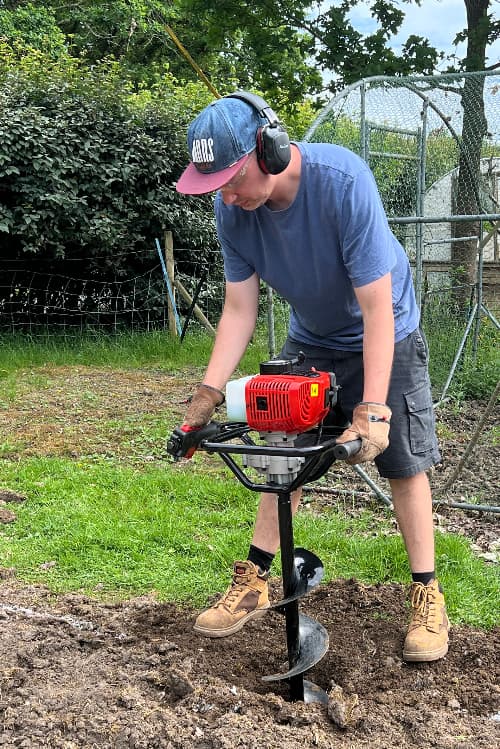
After digging just two of these holes, each of which took an hour. And bearing in mind that we’ll need 14 holes in all (one every five feet per side of our tunnel) I decided to buy a gas powered auger.
This looks, and sounds, like a chain saw, only instead of a blade it has a massive screw attachment. And it certainly sped up the business of cutting through our hard compacted soil.
Filling in the post holes
Once the four corner holes were completed it was time to get the poles in and re-measure our rectangle. I set up the front two first. These needed to be exactly 14 feet apart and aligned with the edge of my field and the path next to it.
There were bolts attaching the pole to the soil plate which we needed to tighten and then we began to slowly fill the hole in. Stopping at intervals and using a sturdy spirit level to make sure that the post was true vertical and not leaning in one direction or another.
What about sloping ground?
Sloping ground is something you might need to take into consideration. Facing the front of my tunnel, I had a slight slope in the ground from right to left.
This is important because the hoops need to be exactly the same height. This is where my spirit level on a string comes in. We stretched it tightly between the two front posts and banged the right hand post in a tiny bit so that they were level.
There was also an upwards incline from front to back of the tunnel. But according to the manual, this is not important.
TIP: If you are planning on using the soil plate method dig a test hole before you order your tunnel. It may change your opinion!
Challenge no. 2 – water everywhere
We had filled in and secured all the posts down one side and were ready to begin the second side when we faced a major problem. The weather.
It rained heavily every day for the next couple of weeks. And while I have waterproof clothing and am happy to work in the rain, the post holes we had dug filled with water.
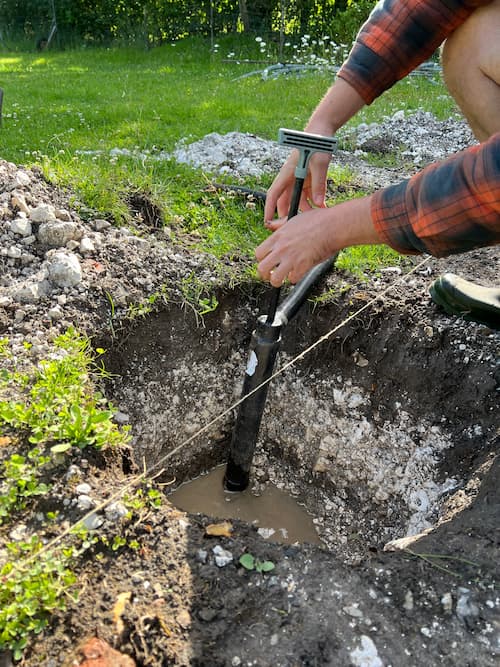
We tried baling the holes out but by now, the water table was so high, that even when the rain had stopped, the holes filled up almost as fast as we emptied them.
So we just had to wait until the rain subsided and the water level dropped. This put our schedule back by a couple of weeks.
Once the post holes were dug and dry it was time to get the posts securely in and accurately positioned
Challenge no. 3 – getting the posts positioned correctly
I think this was actually the hardest part of the whole project. We got the corner posts in first, positioned in each corner of our rectangle in exactly the same way as we marked the rectangle in the first place. Only this time we also had to make sure that the posts were vertical.
This was challenging because the top of the post is accessible to our two surveyors tapes, but the bottom of the post is not. So one person has to hold the top of the post exactly under the two crossed tapes while the other person holds a spirit level up against the post and taps the bottom to get it vertical without moving the top.
There may be some fancy tool to get this right, but we couldn’t figure out a way to achieve this easily. It took a lot of time and effort, crouching down on hands and knees to complete each pole.
ASSEMBLING THE FRAME
I thought this part would be very difficult but it wasn’t too hard. And it was very rewarding to see the outline of our new hoop house take shape. What I hadn’t estimated accurately was the time this would take.
We had to stop several time to watch the video instructions as we progressed. And the quality of the videos was good. These are the steps for assembling each hooop
- separate the packs of tubing
- remove sticky tape
- wash each pipe with soapy water
- assemble each hoop on the grass
- secure with self tapping screws
- insert each hoop into two ground supports
All the tubing came in pieces, and there was a lot of it! The pieces were bound together in several packs with swathes of tape, which was seriously sticky. So it took us half an hour or so to get these apart and get most of the tape pulled off.
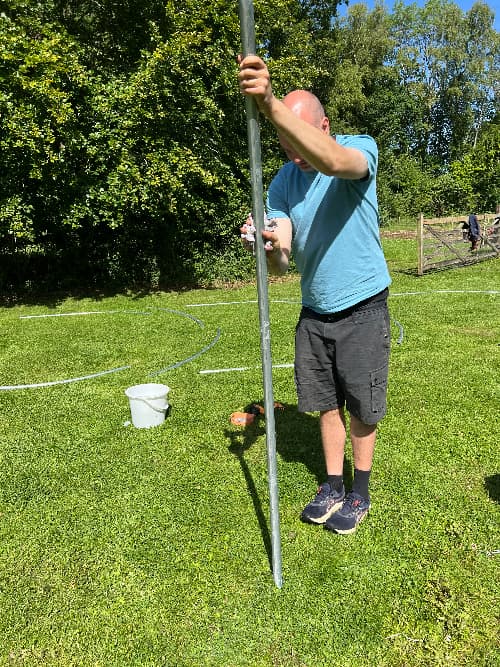
Then each pipe had to be washed in soapy water to remove the protective grease that they were coated in. We then laid the pipes out on the grass to assemble them. You need quite a big flat space for this.
Don’t panic if the hoops don’t look high enough on the ground. You have to pull them in towards each other to drop them over the swages of your foundation poles, and this forces the structure upwards
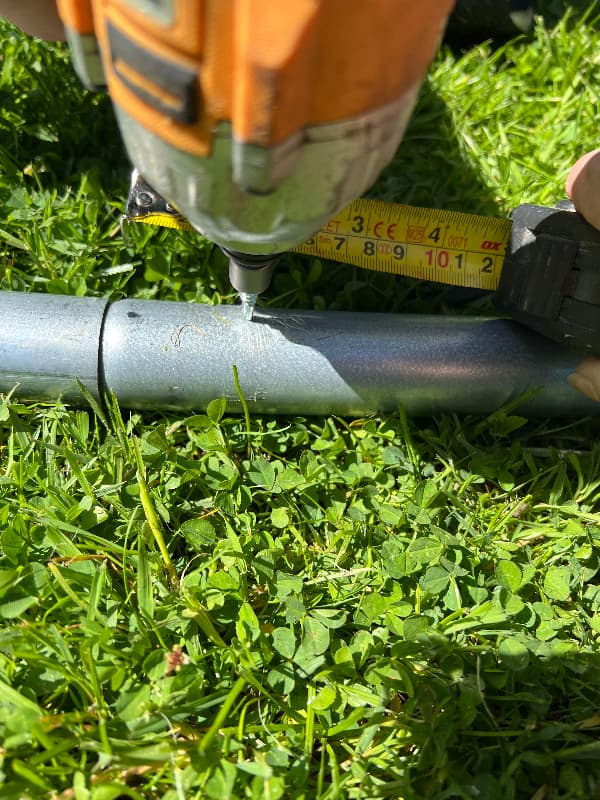
The pipes are joined together by slotting one into another one and securing the join with a self tapping screw. If you are not familiar with these, and I wasn’t, they are quite hard work to push into the metal. You’ll need a powerful impact driver and most importantly safety goggles, as tiny bits of hot metal fly off the pipe while you are working!
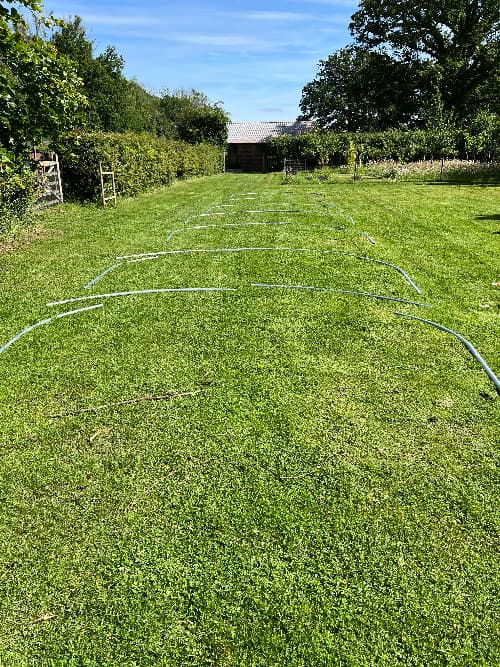
We did this on grass but with hindsight a wooden plank beneath the pipe would have been helpful to push against. Some of the self tapping screws sheared off or melted. Don’t attempt to reuse them, it doesn’t work, and mind your fingers if you drop one, they get very hot.
The next step was to insert each hoop into its ground supports. This didn’t take long and at last we could start to see our high tunnel taking shape!
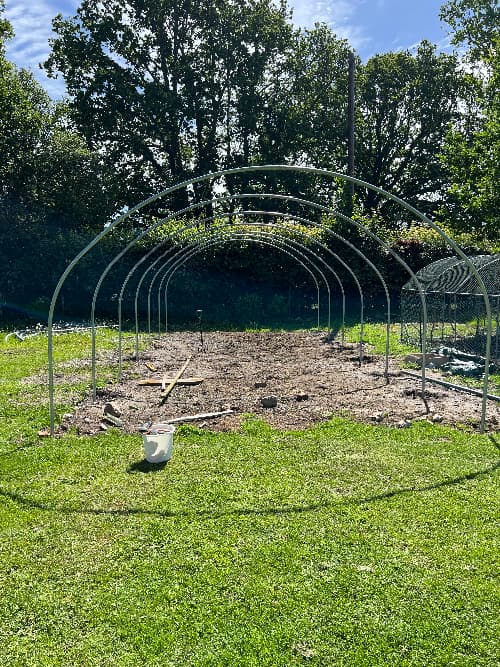
With the main frame assembled we then set about putting up the corner braces, ridge poles, and storm braces. This went fairly smoothly and gave the whole frame a lot more rigidity. But it wasn’t particularly easy.
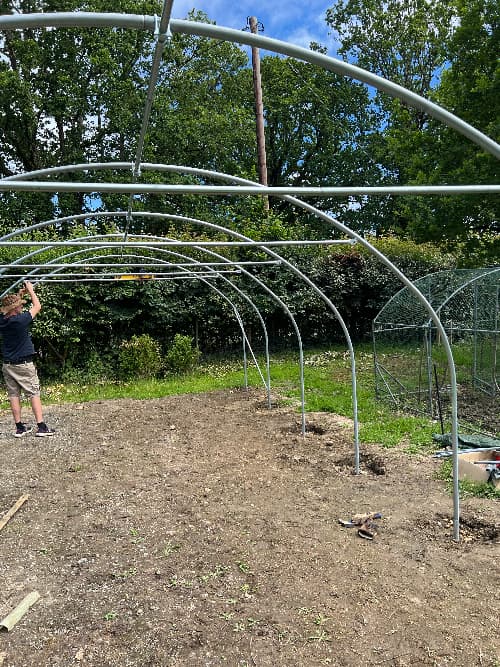
The hardest part was inserting the self tapping screws upwards while balancing on a step ladder. I simply couldn’t have done this myself as I am not strong enough. It’s one thing using your body weight to push a self tapping screw into a metal pipe on the ground using your impact driver,, but it’s a very different matter doing it while pushing upwards at the top of a ladder.
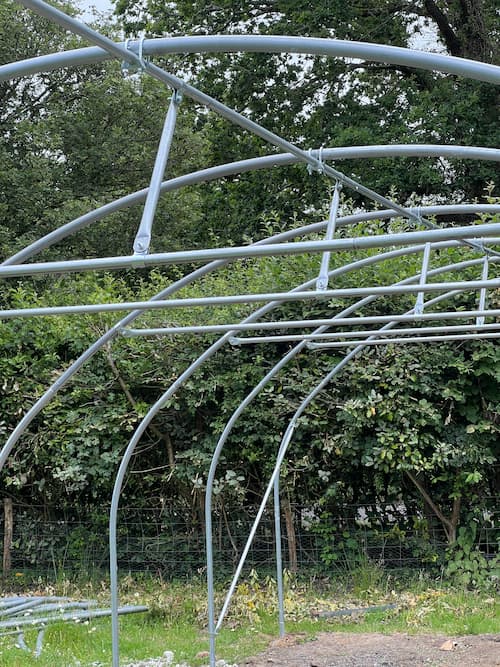
The ridge pole hung from the centre of each hoop using metal collars and was secured to the crop bars with a bracing bar. This all added up to quite a few more hours of work.
We also put up the supports for the staging – I’d ordered this for one side only. These were very straightforward to assemble. And then it was time to fit the wooden rails that went all around the frame. This was what we’d be attaching the cover to.
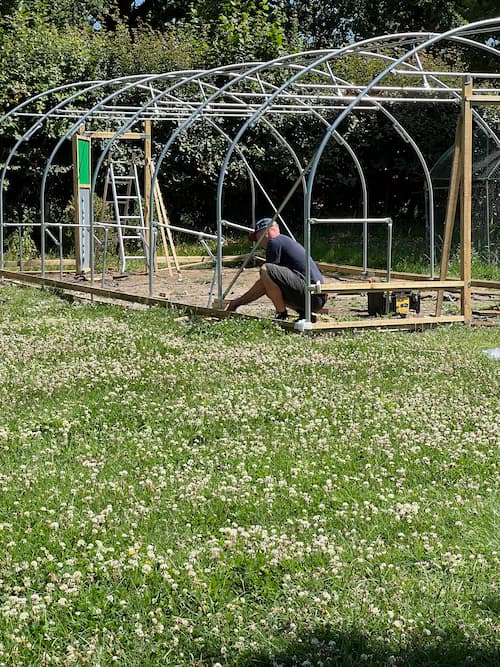
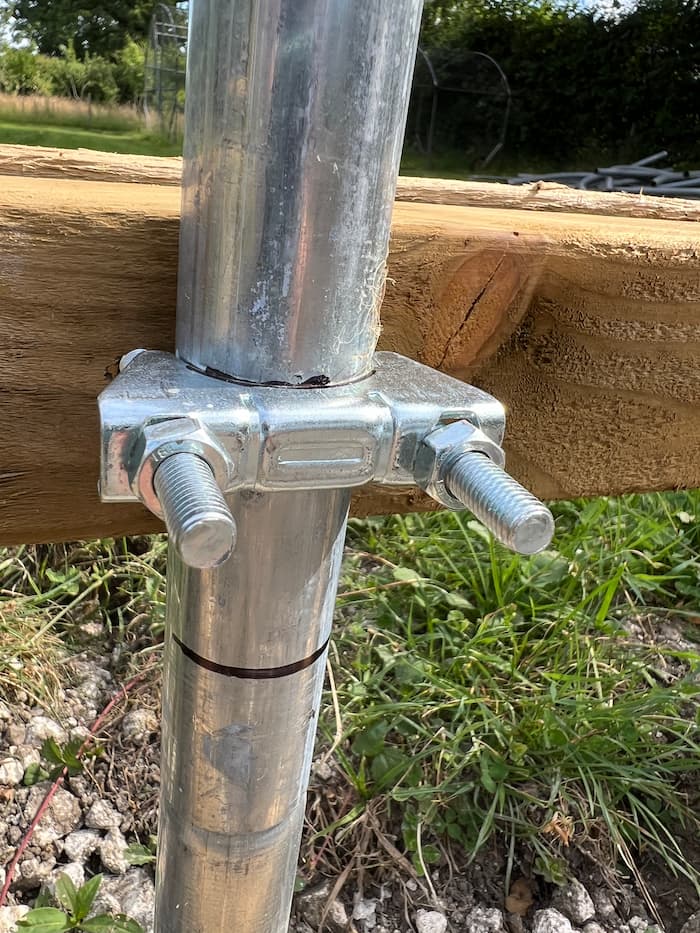
The rails were attached to the uprights with more collars. The idea is that we would raise the entire rail when we attached the cover, so that when we dropped the rail it would tension the plastic.
The door frames used the same timber as the side rails, and we did these next. Toby also started making the doors at this time – we had some problems with these and I’ll talk about that later
All in all, fitting the rails and door frames was quite a big job, several hours work. Having a decent chop saw helped as the rails needed to be cut to size, but wasn’t a huge factor. It’s just a time consuming process.
It was so exciting to be nearing the end of frame construction and preparation, and while we were a bit daunted, we couldn’t wait to get the cover on. We thought it would be a four man job and arranged for two family members to come and help us.
Adding The Cover
There is a bit more preparation to do on those side rails. Before the cover goes on we needed to:
- Attach battens
- Raise the side rail
- Arrange helpers
The cover of a polytunnel is held in place using battens that you nail to the wooden side bars that are attached to the metal hoops. The first set of battens go on before you add the cover. The second set go on top of the cover which is pulled tight over the first batten and trapped underneath the second. Like the side rails, some of the battens have to be cut to fit, so this took a while.
Next we had to loosen every nut on both sides of every collar attaching the side rail to the hoops down either side of the tunnel. The it was time for the big day!
Putting the cover on the high tunnel was an incredible milestone for us. And we were seriously excited about it. We figured it would be a four man job. But when the day arrived, our helpers were unable to come as they had a family emergency. And according to the weather forecast, this would be the last day for many days, without wind..
Wind, and large areas of unsecured plastic sheeting do not go well together. So we had to make a decision. Go it alone, or wait more than a week.
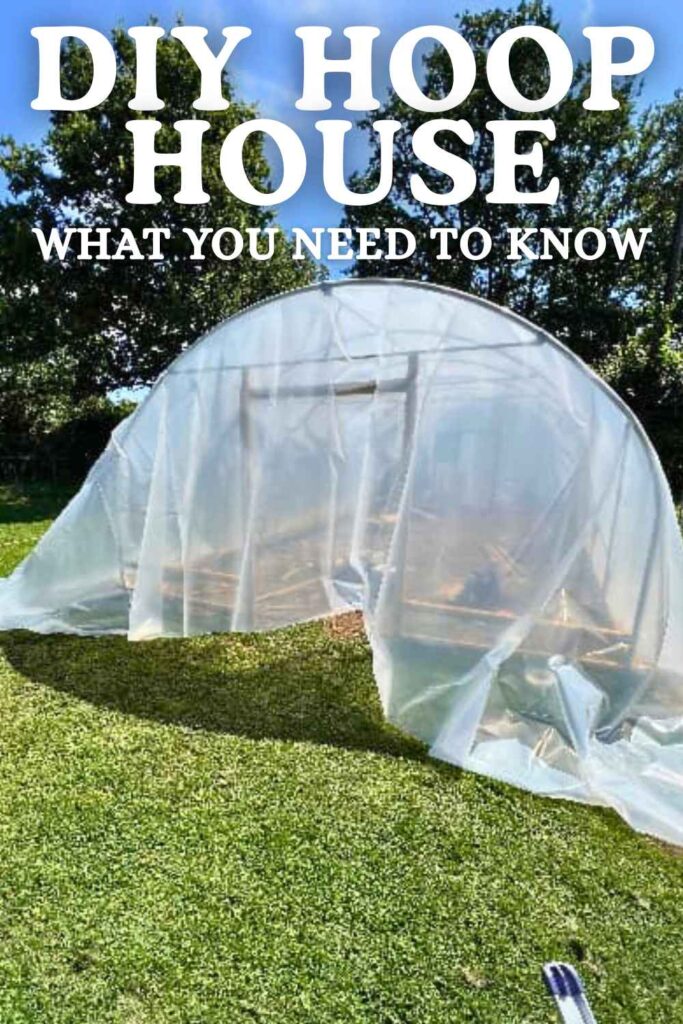
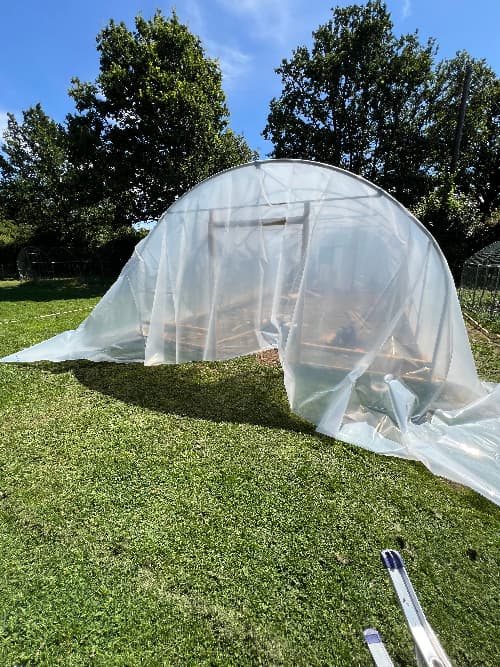
The sun was shining. There was no wind at all. And impatience got the better of us. We spread the plastic sheeting out on the grass next to the hoops and began to drag it up the sides and over the top.
Dragging the cover across the hoops
The sheet was plenty big enough which was a relief, but a thirty plus foot long of very wide thick plastic is seriously heavy. So the job did require a certain amount of strength.
Once we had spread the sheet right across the tunnel and got the two sides fairly even, with a decent overlap all around, it was time to start attaching the second set of battens.
Stretching the cover
Here again, strength was required. One person pulls on the plastic sheeting with all their strength while the other person tries to push the batten tight up against the batten underneath and nail it in place.
We started in the center of one side and worked out towards the end. It is quite tricky ensuring there are no wrinkles. Then comes the two ends. And these were quite challenging.
Ruching the ends
The front and back ends of the high tunnel plastic are gathered into folds and attached to the door frame, also with battens.
This was very challenging because there is no exact way to describe this process. It’s more of an art than a science. And with the extra material in the gathers, its quite hard getting the second battens nailed down securely. But we got there in the end.
Lowering the rail
The final step was to lower the rail to its original position and retighten it. Even with both of us standing on the side rail we could not get it right back to where it was before we raised it. However, the plastic was stretched and tight as a drum. Which we assumed was the goal. So we did our best and then tightened everything up again
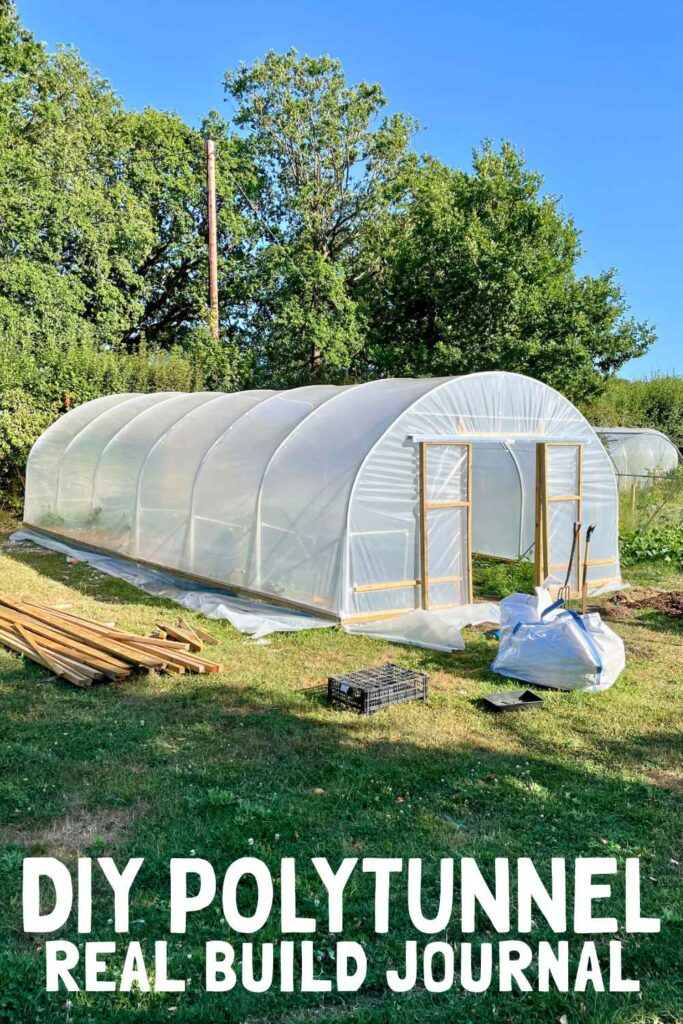
All in all, the whole process took two of us most of the day. But it was such a sense of achievement when we got there! After weeks of work. We actually had a high tunnel. And the heat inside was incredible! More of that later!
Coming soon! Planning the beds and getting plants into the tunnel.
Pin For Later