Harvesting And Freezing Green Beans: How To Preserve Flavor And Texture
Green beans, whether the bush or pole varieties, mature quickly. (You’ll find information about how to grow them here)
I messed up a bit this year and let quite a few of my beans get too big! Once they start to mature, they grow super fast and its easy to let them get away from you.

Fortunately there are still plenty for me to freeze. And next year I’ll set a reminder on my calendar to start checking four weeks after each planting.
Green beans are really easy to freeze and store well in the freezer for several months. Here’s how you can get it right each year!
When do green beans start flowering?
I don’t harvest my beans based on DTM (days to maturity) though this is a useful guide to when things will get going. Instead I harvest them based on their appearance. I’ll explain exactly how to do this below.
But your DTM will help you know when to start checking your bean plants on a daily basis. I do this once the first flowers have appeared. This is usually around 5 weeks after planting, but it can be a week earlier.
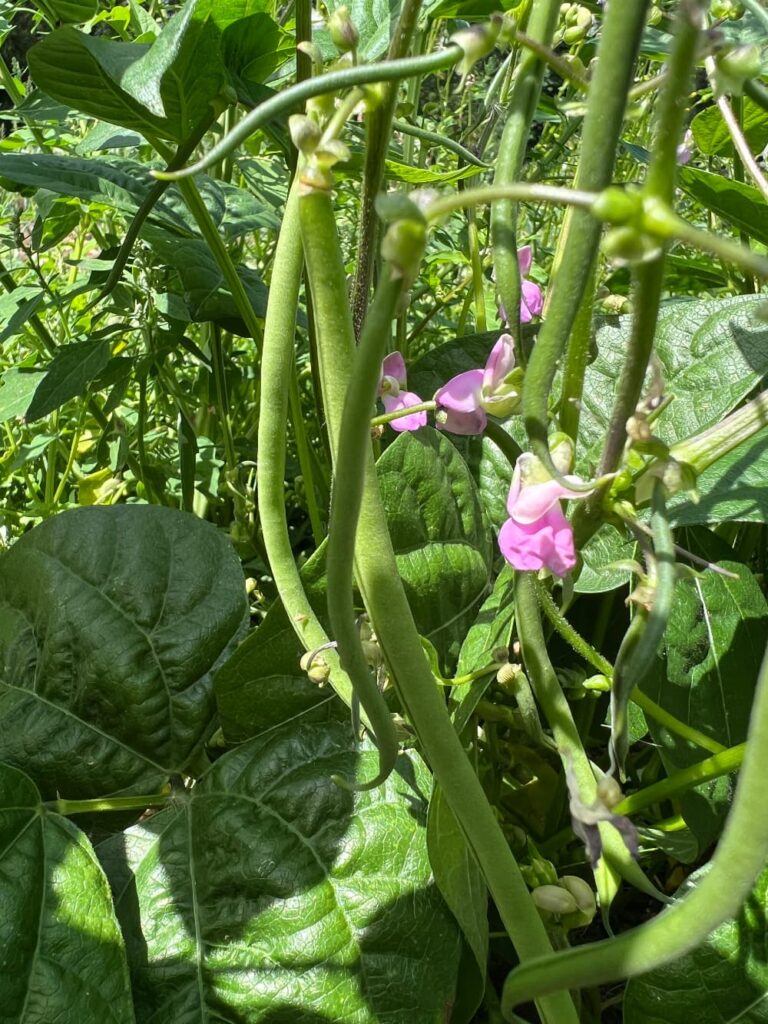
Once those first flowers arrive, you have only a week or two (depending on the weather) before your first beans will be ready to harvest. And the bean plants will carry on making more flowers for a while.
Even if you stay on top of them, there will be some beans that are not suitable for cooking and eating. And which ones those are, is a bit of a subjective topic.
When are beans ready to pick?
For me, I’m really fussy about my green beans. If they don’t look like a fancy five star restaurant would be happy to serve them, I probably don’t want to eat them!
The rest of my family are less picky but I’ll tell you how I make sure my beans are ‘melt in your mouth’ tender. These are the beans I keep:
- They are four to five inches long
- They are the same width along their length, no swellings or bulges
- If you snap one, they look the same all the way through, no visible seeds inside
In the photos below you can see the difference.
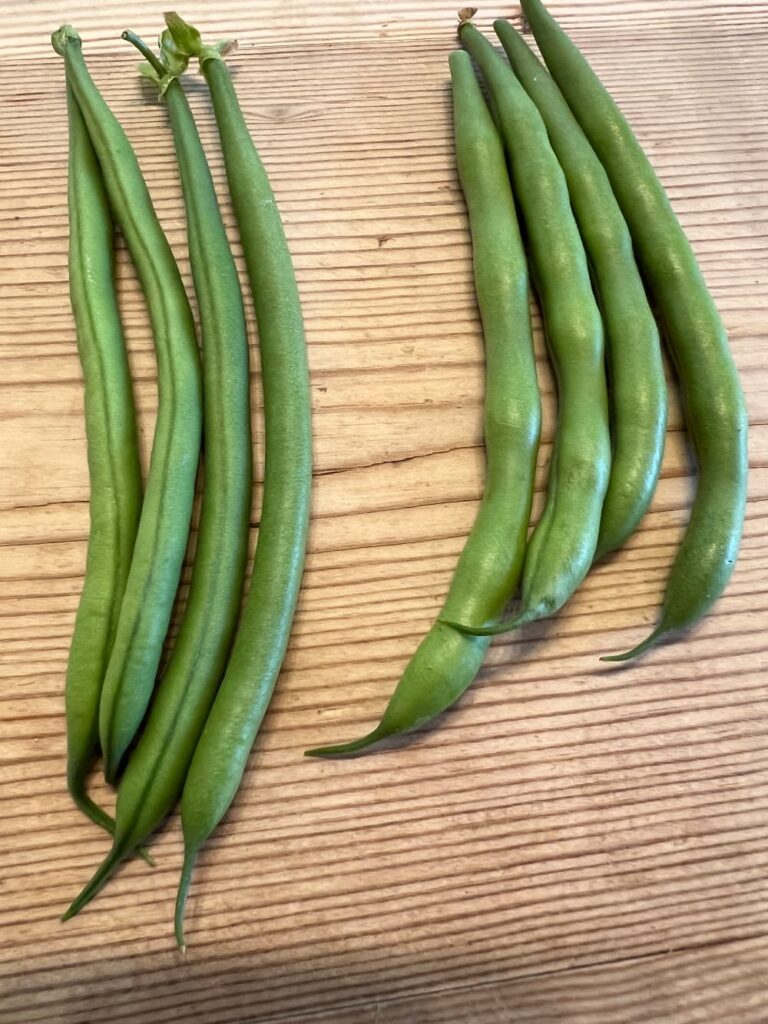
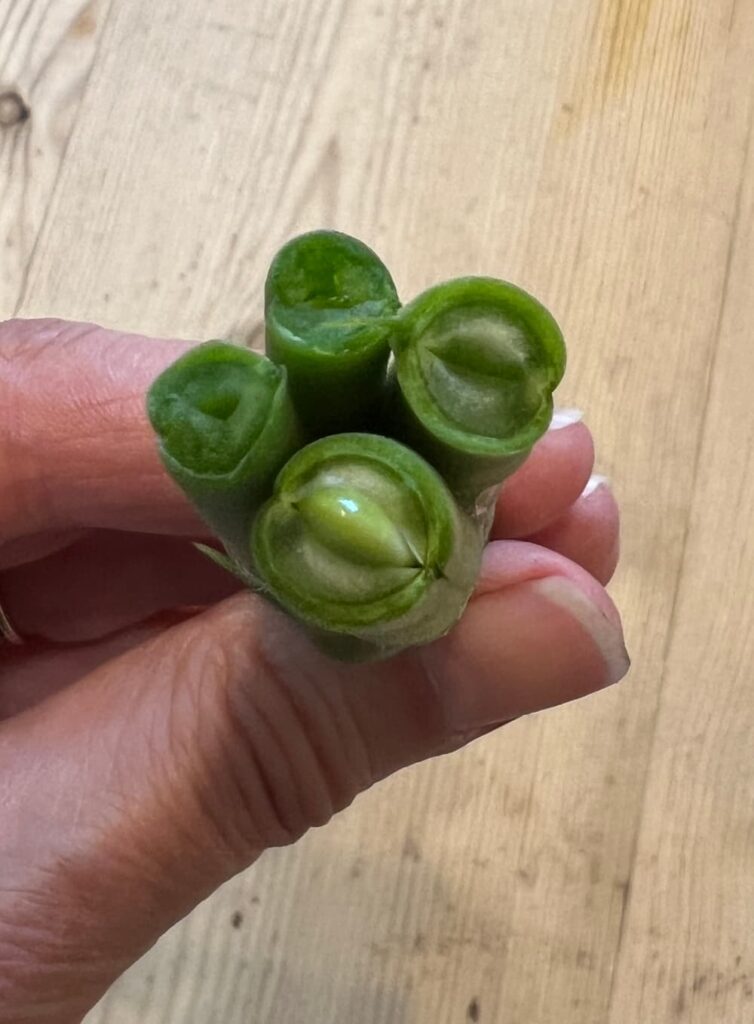
Sure you can let them grow to the full length it suggests on the seed packet. But be aware they can go from perfect to pretty ropey, almost overnight. So I tend to pick them on the small side. Check the seed packet too as some varieties have longer pods than others, and you may be able to experiment with letting yours grow a little more.
Picking daily helps the plant to produce to the maximum of its ability. Remember to check the beans each day once you start to pick them, until there are no more beans or flowers left on the plant.
How to pick green beans without damaging the plant
Picking beans is a two handed job, so you’ll need to put your container down and drop beans into it, or tie it around your waist.
Grip the stem of the bean just above the pod with one hand and pull gently on the bean with the other. Sometimes the bean comes away with a bit of stem attached, sometimes the stem snaps off, either is fine.
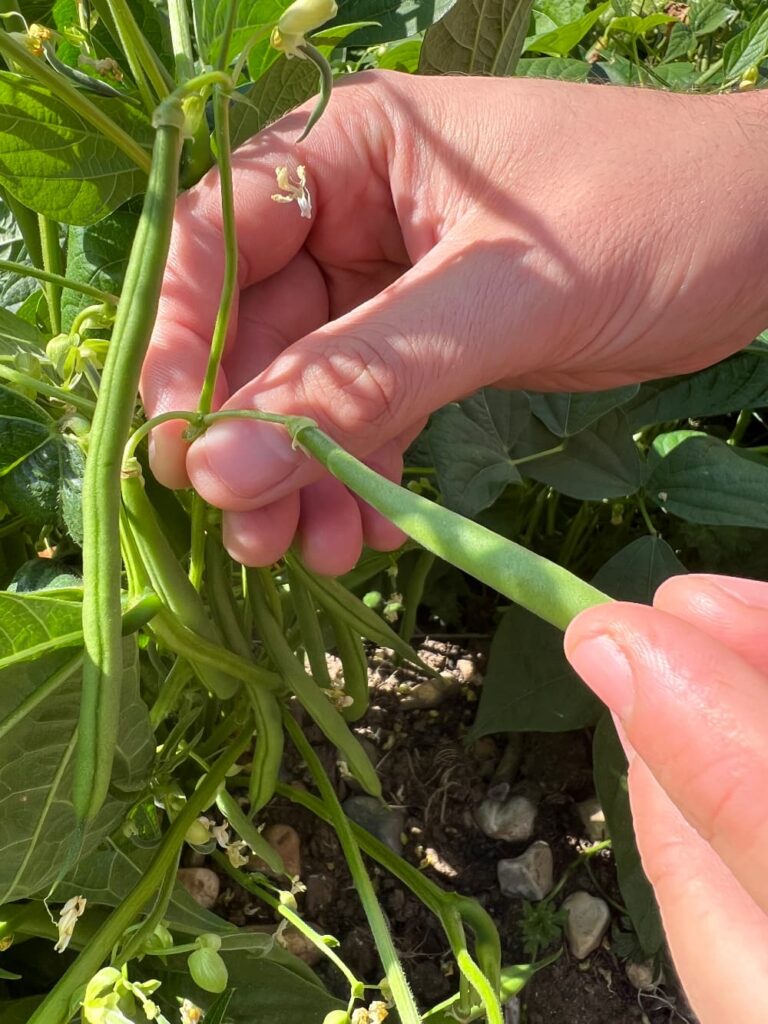
Beans are fairly delicate. If you try to pick them one handed, you’ll find that whole branches of the plant will break off, and any flowers or immature beans on it will be wasted.
Why choose freezing?
There are various ways to preserve green beans. I freeze mine but they can also be canned, pickled, dehydrated and even fermented.
Why do I prefer freezing? Well, beans are low acid and need to be pressure canned, which is a bit more involved than freezing. And of course dehydrating and pickling create a significantly different flavor and texture.
Freezing preserves most of the flavor, its relatively simple to do, and provided you blanche the beans properly it preserves most of the texture too.
We’ll talk about how to blanche and freeze down your crop, but first we’ll take a quick look at preparation, its very straightforward.
Washing
I don’t use chemicals on my green beans but I still wash them.
I drop my freshly picked beans straight into a colander. If you don’t have one, the top section of a steamer, or large kitchen sieve will do nicely.
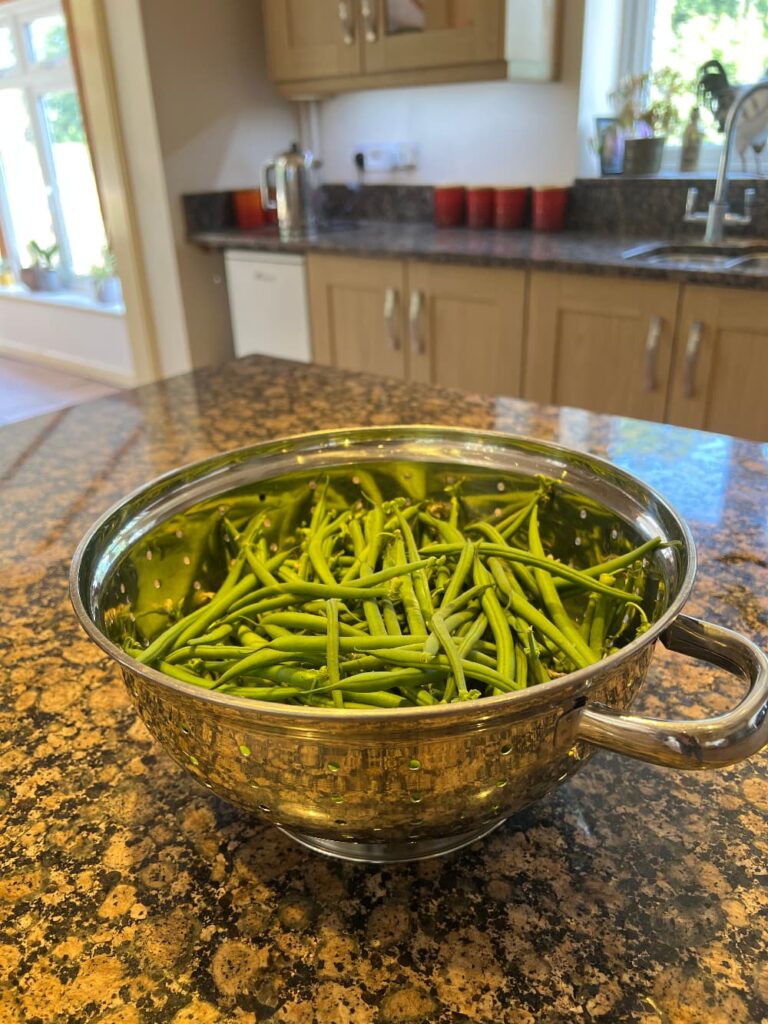
Then I run it under the cold tap to wash off any stray bits of soil or other debris.
Top and tailing
The top of the bean is the bit where it joined the bean stem. If you snapped the pod beneath this it won’t have a top. And the bottom is just the pointy tail of the bean.
If you ‘top and tail’ your beans you remove both ends. I actually only remove the top bit of stem (if its still there) and I leave the tails on them. But it’s entirely up to you if you want to do both.
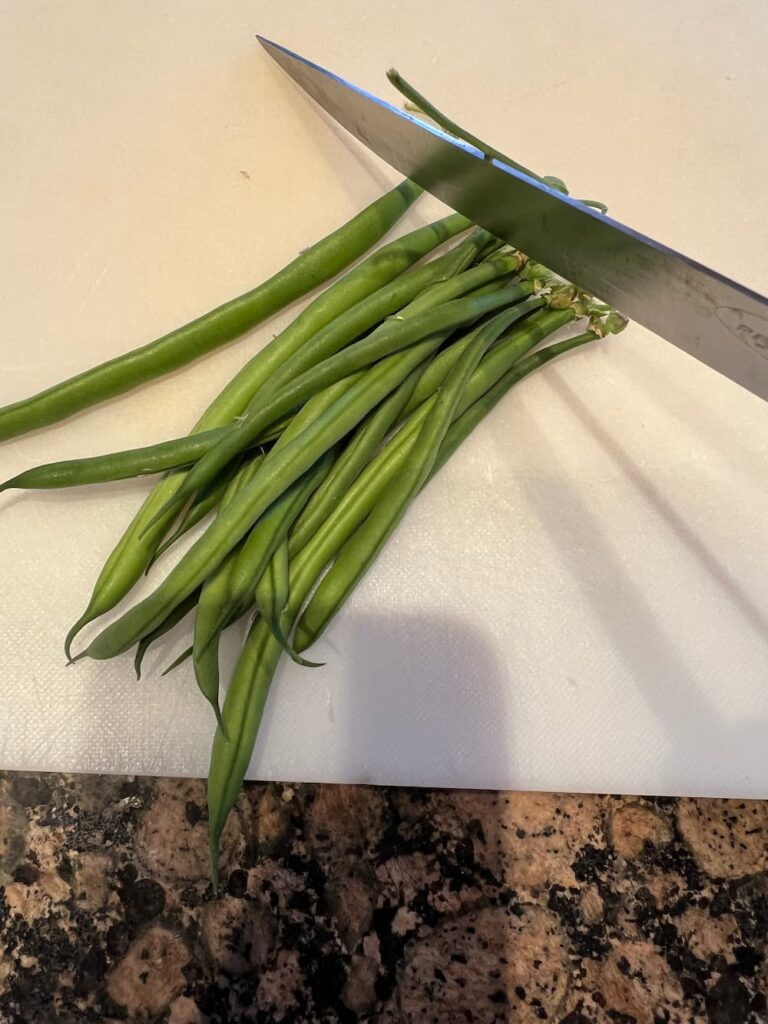
Line a few beans up in a row and slice the ends off with a sharp knife. Then you are ready to blanche!
Blanching your beans
The purpose of blanching is to kill any bacteria present on the outside of the beans and to deactivate the enzymes in the beans that cause the beans to continue ripening and breaking down even after freezing has slowed this process down.
Blanching is achieved by plunging the beans briefly into boiling water. This is followed by plunging them into icey cold water. I blanche my green beans for 3 minutes exactly, timed from the moment the water returns to the boil.
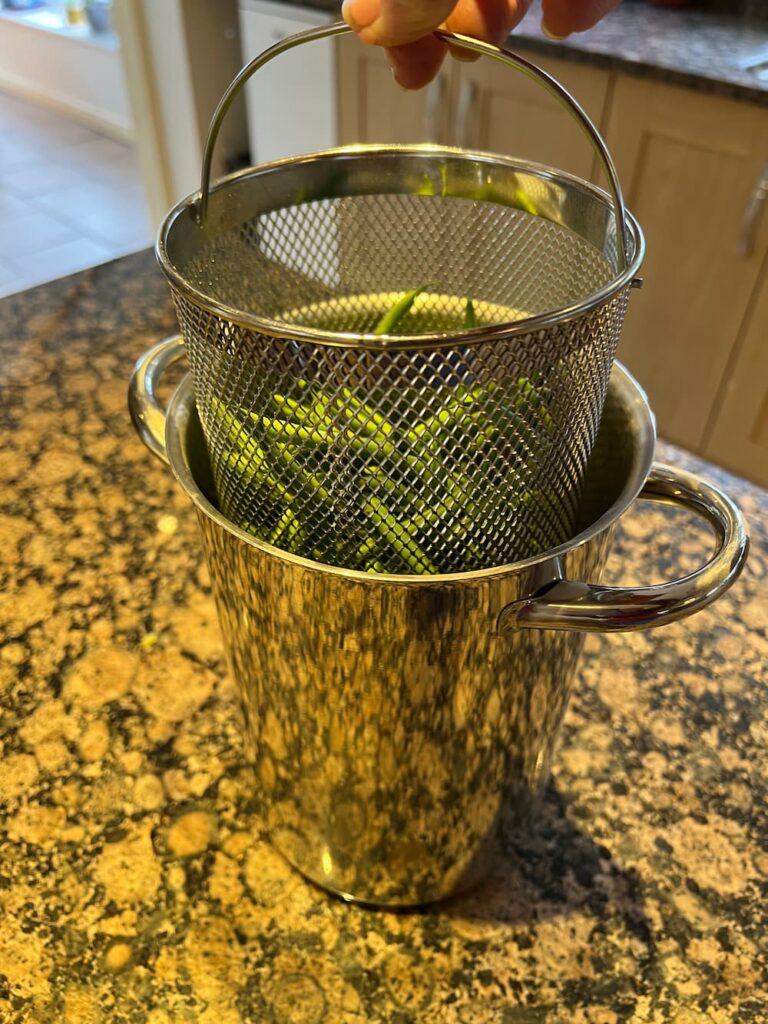
Having the beans in a basket of some kind inside the pan of boiling water makes the whole process easier. I use my old asparagus steamer for this.
Icing your beans
The longer the bean stays hot, the more it ‘cooks’. But we don’t want the beans to cook at this point as cooking makes them soft. That’s where icing comes in. You plunge your hot beans into iced water to cool them as fast as possible and this sudden drop in temperature terminates the cooking process.
If like me your ice maker decides to quit on you, the day you want to process your beans, its ok to use very cold water from the tap, provided you change it several times during the process. For good measure I added a bottle of water that I had frozen for my rabbits during the heatwave.
Blanching Summary
- Set a pan of water to the boil
- Fill a pan with iced water
- Add the beans to the boiling water – boil 3 minutes
- Drain the beans and drop into iced water
If you are blanching large quantities do it in batches. Too many beans will take a long time to return to the boil. And a long time to cool down in your ice bath. Speed is of the essence!
Once you have blanched and cooled your beans, set them aside to dry. Then its time to start the freezing process.
Freezing your beans – different methods
I do not want to spend half an hour on a cold winter’s evening chipping away at a solid green brick to get a few beans to cook for supper. I like to be able to pour loose beans from a freezerproof container.
I do not like to involve single use plastics if I can help it, for obvious reasons, including the use of a vacuum sealer which also creates odd shaped packages that don’t stack neatly in the freezer. For these reasons I prefer to flash freeze my beans in a single layer on a baking sheet, and put them into a container a couple of hours later.
This is a little more labor intensive, and won’t suit everyone. You need to be willing to freeze in batches. But if you want to be able to shake a few frozen beans from a box when you need them, it’s the only way to go. And I think its worth the extra effort.
I use tupperware style reusable plastic boxes and I also have some glass freezerproof boxes with tuperware lids that work well.
Preventing freezer burn
With this method you do need to watch out for freezer burn. Set an alarm for 2 hours so you don’t forget your tray of beans and leave them unprotected in the freezer for any longer. And try to reduce exposure to air when you pack them.
I pack the first few batches into quite a small box, and later I might tip the contents of several small boxes into a bigger one. Less air space equals less freezer burn.
Don’t forget to label and date your boxes!
Storage time
Frozen and well packed this way, beans will keep 8-9 months in the freezer without losing too much flavor. Hopefully by that time you’ll be ready to start harvesting next year’s crop.
Green beans are so easy and rewarding to grow. If you haven’t already I hope you’ll give them a try. And I hope you find this system helpful. We’ve refined it over the years, and it does seem to be the best way to make the most of these delicious and nutritious vegetables.